
Woodworking and DIY projects often require precise and accurate drilling at various angles, making it crucial to have the necessary knowledge and skills to achieve this task. However, drilling holes at an angle in wood can be challenging and daunting for beginners and experienced woodworkers.
This requires specialized techniques and tools to ensure the holes are drilled correctly and at the desired angle. Knowing how to drill holes at an angle in wood is essential for creating functional and aesthetically pleasing pieces, but it also saves time and minimizes the risk of mistakes or damage to the wood.
Here, we will discuss step-by-step instructions on drilling holes at an angle in wood, the tools and materials needed, and some helpful tips and tricks to make the process easier and more efficient.

Tools And Materials
When drilling at an angle, there are a few specific tools and materials that you will need to ensure successful and accurate drilling. Remember to carefully follow the manufacturer’s instructions for the specific tools and materials you are using. Additionally, practice on scrap materials before attempting angled drilling on your desired.
- Drill
- Drill Bits
- Angle Guide
- Protractor or Angle Finder
- Clamps or Braces
- Safety Equipment
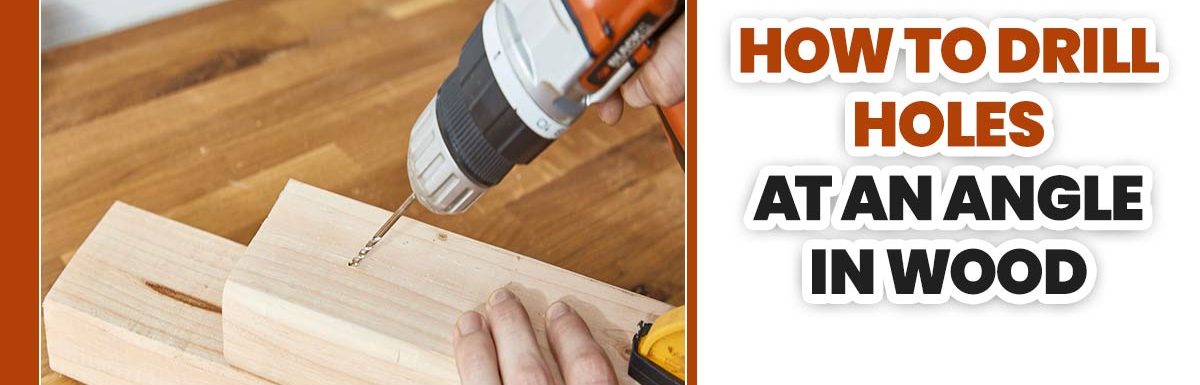
How To Drill Holes At An Angle In Wood – 5 Right Steps

Drilling holes at an angle in wood can be tricky, but you can achieve precise results with the right technique. Here are five steps to help you drill holes at an angle in wood. Remember to wear protective eyewear and follow safety guidelines when using power tools. With practice and patience, you can master drilling holes at an angle in wood for various woodworking projects.
1.Choose The Proper Drill Bits

You’ll need to use a special drill called a spade bit to drill holes in wood at an angle. This bit has a serrated edge that helps grip the wood fibers and make precise holes without damaging them. Measure the depth and width of the hole you want to make to find the right size spade bit for your project.
Then, use this information to look up the appropriate size spade bit online or in your toolbox. Once you’ve found the correct bit, place it on the drill chuck and tighten the knob until it’s snug. Start drilling by slowly lowering the bit into the hole until it bottoms.
Then, turn the drill on and spin it around in circles at a high RPM. This will help create deep holes quickly and without any fuss. Remember to keep your hands well away from the spinning. Drill bits – they can be very dangerous if not handled correctly.
2.Drill A Shallow Pilot Hole At 90 Degrees

To drill a hole at an angle in wood, you’ll first need to make a shallow pilot hole. This hole will allow the drill bit to enter the wood at a gentle and gradual angle, minimizing damage and avoiding splitting the wood. To make the pilot hole, mark your desired hole’s location on the wood’s surface.
Then, use a jigsaw or saw to create a rough outline of your desired hole. Make sure that your Pilot Hole is exactly 90 degrees from the direction. You’ll be drilling — this will help ensure that your drill bit enters. The wood is at an angle and avoids splitting it.
Once your Pilot Hole is ready, it’s time to start drilling. Start by inserting your drill bit into your Pilot Hole and rotating it until you reach the desired depth. Remember that the slower you go with this process, the less likely damage will occur.
3.Shift The Pilot Hole To The Desired Angle

To do this, you’ll need a drill bit that matches the size and shape of the hole you’re trying to make. Then, position the pilot hole over the area you want to drill and center it on your workpiece.
Please ensure the bit is centered in the pilot hole, and press down on it with your fingers until it starts drilling into the wood. Please keep your fingers glued to the drill bit while it’s working so you don’t lose track of where it is. Once your pilot hole is drilled, drill into the wood using your regular drill bit.
Be sure to hold onto the pilot hole as you go – if it slips out of place, you’ll have trouble rotating your screwdriver properly when screwing in your screws later. Also, be careful not to over-tighten your screws – too much force will cause them to break off rather than insert into the wood securely.
4.Switch To A Larger Bit
If you want to drill holes at an angle in wood, switch to a larger bit. Bigger bits are better at drilling through hard materials like wood and cause less damage and wear on the drill bit. There are a few different types of bits that you can use for drilling holes at an angle, but the most common ones are the spiral and spade bits.
Spiral bits are designed specifically for this purpose and work by spiraling their way through the wood. Spade bits work similarly, but they have a wider cut. Z Both types of bits will work just as well if you use them correctly – by rotating them around the drill bit as you drill. This will prevent them from becoming jammed or twisted, ultimately leading to problems.
5.Drill The Final Hole

You will need a drill with a straight bit and an angle setting to drill the perfect hole for your project. Begin by drilling a pilot hole, then adjusting the angle to get the desired hole shape. Next, use wood glue to secure the hole in place. You’ll need an exact angle drill to drill the final hole in your wood frame. This will allow you to drill at a slightly oblique angle, which will help avoid splitting the wood.
You’ll also need a bit that matches the size of the hole you’re drilling – and, of course, some wood glue. When you reach the final hole, stop drilling and put a drop of glue on top of it. Hold onto the wood while it sets for a few minutes, then carefully screw in your bolt or screws.
Tips For Maintaining Accuracy And Precision
When drilling holes at an angle in wood, maintaining accuracy and precision is key to achieving the desired result. Here are some tips to help you drill at an angle with confidence. By following these tips, you can maintain accuracy and precision when drilling holes at an angle in wood.
- Use A Drilling Guide Or Jig: A drilling guide or jig can help ensure your drill bit stays on track and drills at the desired angle. These tools can be purchased or made at home using scrap wood.
- Mark Your Drill Points: Before drilling, mark the location of your holes in the wood using a pencil or marker. This will serve as a guide for where to position your drill.
- Start With A Pilot Hole: To prevent your drill bit from wandering off course, drill a small pilot hole at the desired angle. This will serve as a guide for your larger drill bit.
- Take It Slow: When drilling at an angle, gently applying gentle pressure is important. Rushing can lead to mistakes or damage to the wood.
- Test Your Angle: Before committing to drilling all of your holes, it’s a good idea to test your angle on scrap pieces of wood. This will allow you to make necessary adjustments before your final project.
Common Mistakes To Avoid

Drilling holes at an angle in wood can be tricky, but with the right technique, it is achievable. However, there are some common mistakes that you should avoid to ensure a successful outcome. First and foremost, one of the biggest mistakes is not using a drill guide or jig to help maintain the desired proper angle.
This can lead to inaccurate holes and potentially ruin your project. Another mistake to avoid is applying too much pressure while drilling. Excessive force can cause the bit to slip or wander off course, resulting in a messy hole. Lastly, failing to secure the wood properly can also lead to issues.
Ensure the wood is clamped securely before drilling to prevent movement or shifting. By keeping these common mistakes in mind and taking the necessary precautions, you can achieve clean and precise angled holes in wood.
Troubleshooting And Problem-s=Solving
When drilling holes at an angle in wood, it’s important to troubleshoot and problem-solve to ensure accurate and precise results. Here are some common issues that may arise and how to address them. By troubleshooting these issues and utilizing proper techniques, you can successfully drill holes at an angle in wood with precision and ease.
- Drill Bit Slipping: If the drill bit is slipping or not gripping the wood properly, try using a center punch to create a small indentation for the drill bit to start in. This will help provide a better grip and prevent slipping.
- Splintering Or Tear-Out: Place a sacrificial Wood piece of scrap wood underneath the workpiece to avoid splintering or tear-out when drilling at an angle. This will help support the wood fibers and prevent them from splintering as the drill exits.
- Incorrect Angle: If you’re not achieving the desired angle with your drilled holes, consider using a drill guide or jig. These specialized tools can help ensure consistent and accurate hole angles.
- Drill Bit Dullness: Dull drill bits can cause uneven and messy holes. Make sure to use sharp drill bits and replace them when necessary. Regularly sharpening your drill bits can also help maintain their performance.
Conclusion
Drilling holes at an angle in wood may initially seem challenging, but it can be accomplished easily with the right techniques and tools. Following the steps outlined, you can achieve precise and accurately angled holes in your woodworking projects. Remember to mark the desired angle on the wood and use a drill guide or jig to maintain consistency.
Additionally, ensure that you have the appropriate drill bit for the job, such as a brad point or spade bit. Take your time and apply gentle pressure to avoid splintering or damaging the wood. You will become proficient in drilling angled holes and expand your woodworking skills with practice and patience.
Leave a Reply