If you’re looking for an easy way to spruce up your outdoor space, replacing your outdated outdoor water faucet is a great way to do it.
Various outdoor faucet types are available, so finding the right one for your needs isn’t hard. In addition to the tools and materials you’ll need, there are also a few tips and tricks you’ll need to know to get the job done smoothly.
From turning off the water to properly draining and cleaning the faucet, read on to learn everything you need to know about replacing your outdoor water faucet.
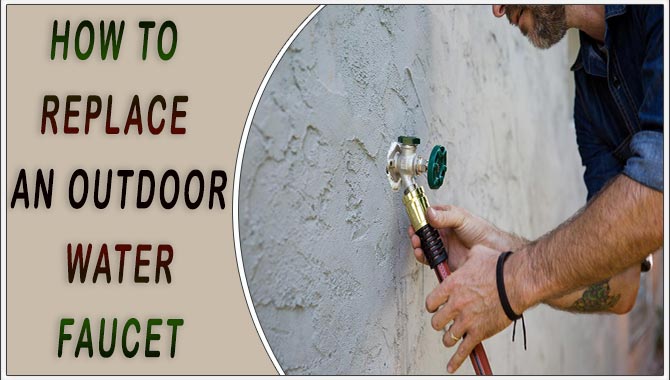
Types Of Outdoor Faucets-Follow The Guide Below
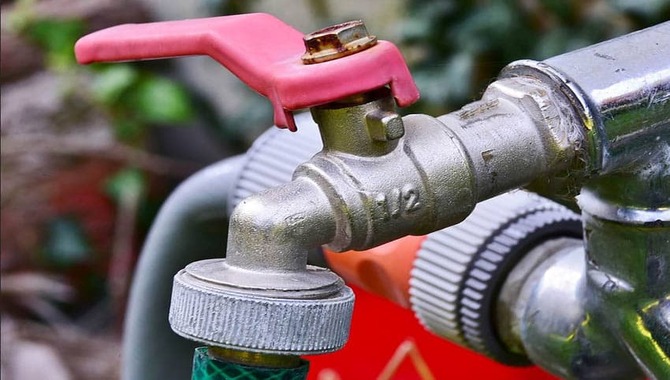
It’s time to ditch that old outdoor water faucet and get a new one. Here are the simple steps you need to take to get the job done:
- Choose the correct type of faucet for your needs. There are three main types of faucets – garden hose faucets, lateral hose adapters, and water spigot faucets.
- Determine the size of the faucet you need. Measure the distance between the faucet and the water hose connection point on the spigot.
- Order your faucet and hose attachment from a reputable online store.
- Install your faucet by following the installation guide that was sent with it. Once installed, test it out to make sure it works properly.
Tools And Materials Needed For The Replacement
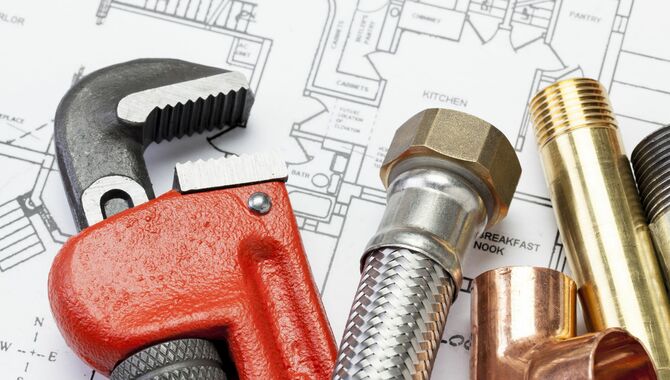
– Outdoor water faucet
– Wrench or pliers
– Tapping tool (optional)
– Hammer or screwdriver
Parts Needed For The Replacement:
- Outer housing of the water faucet – a few screws and nuts will hold it together. If there is no knob on the spout, use a tapping tool to remove the old spout and attach the new one. Save any washer/nut that came with your replacement spout; you’ll need it later. Pictured here is an outdoor kitchen faucet with a replaceable spout.
- New hose attachment – this piece attaches to the faucet body and has a male ( Called NPT) fitting on one end and a female fitting on the other
- Thumbscrews
- Plated Washer (optional) – This washer is placed over the nut on top of the threaded connector. Between the threads to provide some compression and prevent water from leaking around the screw during installation
- Threaded Connector – This is what attaches your new hose attachment to your faucet body.
- Valve – This component controls water flow from your faucet spout.
- Wrench or pliers (optional) – You’ll need these to unscrew the valve stem and replace it with the new one 8. Valve Cap – This is the cap that covers the top of your valve stem and should be replaced whenever you replace the valve
- Hex Nut – This nut secures the threaded connector to the faucet body. It’s also an excellent place to attach your new washer if you choose to do so
- Hammer or screwdriver (optional) – Used to tap the new spout onto the valve stem.
How To Replace A Threaded Outdoor Faucet
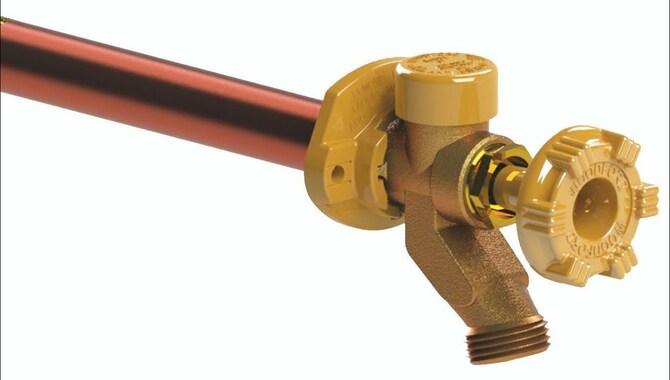
Summertime is a great time to spruce up your outdoor water faucet with a new look. If you’re replacing an outdoor water faucet, it’s simple as 1, 2, 3. Unscrew the old faucet, remove the stem, and replace it with the new one. Be sure to mark where you installed the new faucet, so you don’t lose it later.
To ensure the faucet is leak-free, apply a sealant to the threads of the spout before screwing it onto the stem. If your outdoor water faucet is threaded (like the type used in bathrooms and kitchens), it can replace with a standard garden spout. So there you have it – a step-by-step guide to replacing your outdoor water faucet in no time.
Turn Off The Water
It’s time to replace your outdoor water faucet. Before you do, make sure to take note of these essential steps:
- Disconnect any hoses leading from the faucet to nearby fixtures.
- Turn off the water supply to the house by turning off this valve.
- Locate the valve that controls the water flow from your street main into your home. It’s most likely on a pedestal near or below your sink or in a ground-level fixture like a watering can.
- Turn off the water supply to the faucet by turning it off using either a wrench, if it has one, or by turning it counterclockwise as close to 90 degrees as possible.
- Replace the outdoor water faucet by unscrewing and screwing the new one.
Drain The Faucet
Outdoor water faucet replacement is now a breeze.
1: Unscrew the cover on the faucet and lift out the old faucet.
2: Drain the faucet.
3: Replace the old faucet with a new one.
4: Turn off the main water supply to the house and remove any debris inside.
Remove The Old Faucet
Outdoor water faucet repair is simple if you follow these easy steps. In step 1, turn off the water supply to the house. Next, unscrew the old faucet from the wall.
Hold down one end of the new faucet while your partner unscrews it from its housing. Be sure to remove any rust or debris from around the nipple and threads of the new faucet.
Once it’s free, screw the new faucet into the housing and screw the housing back into the wall. Finally, turn on the water supply to the house and enjoy your new faucet.
Attach The New Faucet
Replacing an outdoor water faucet is simple in just a few steps. To begin, Separate the supply line from the drain connection by loosening the hose clamp and unscrewing it.
Connect the new supply line to the two newly-removed connections, tightening down on each clamp so that no leaks occur during installation. Reattach the hose clamp to finish up.
Next, unscrew the old faucet and remove it from the hose attachment. Finally, screw in the new faucet and tighten down the hose clamp. That’s it – your outdoor water faucet is now replaced.
Weatherproof The Installation
Water is essential for life, and so it’s essential to have a water supply that’s reliable and safe. One of the most common water supply repairs is replacing outdoor water faucets. Here’s a step-by-step guide on how to replace an outdoor water faucet:
1: Check the faucet for any leaks and fix them if necessary.
2: Turn off the water supply to the faucet.
3: Remove the old faucet by unscrewing the handles and removing the faucet.
4: Remove the washer and gasket.
5: Tighten the bolts using a wrench until their snug.
6: Wait 24 hours for the sealant to dry.
7: Connect hoses using weatherproofing new connectors, and reattach any irrigation equipment if necessary.
8: Finish by cleaning up any messes made during installation.
9: Turn on the water supply and enjoy your new faucet.
Turn On The Water
It’s time to replace your outdoor water faucet! Follow these simple steps to get started:
- Locate the valve that turns on the water in your home – it’ll be near a meter or electrical panel.
- Test for leaks by putting your finger under running water and see if it comes out cold or hot – if it’s hot, there may be a leak somewhere.
- Disconnect and remove any hoses connected to the old faucet, then connect them to the new one in reverse order.
- Turn on the valves counterclockwise (left-hand turn).
- Make sure the water is off before replacing the faucet.
5 Helpful Tips In Replacing Your Outdoor Faucet Repair
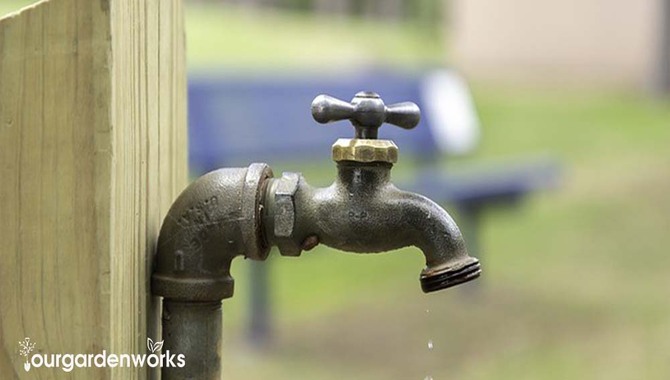
When it comes to outdoor faucet repairs, there are a few helpful tips that you should keep in mind. Ensure your water shut-off valve turns off before beginning the repair.
It will prevent water from leakages and also save you time and energy in the long run. Secondly, use a sealant to protect the area from future weathering and erosion.
Lastly, wet the area around the spigot so you don’t damage anything else in the process. Next, use a hose to remove rust or buildup and a wire brush and coarse sandpaper to clean the faucet. And that’s it! Your outdoor faucet is now repaired and ready to use!
1. Check The Size And The Type Of Thread Of The Old Outdoor Faucet Before Buying A Replacement.
When replacing your outdoor faucet, it is essential to take note of a few simple safety tips. For starters, check for rust and corrosion on the brass parts.
It will affect how easy it is to unscrew and replace the faucet. Make sure you buy a suitable size replacement by checking the dimensions of your old faucet against those of the new one.
Use a wrench when unscrewing and tightening back up again – this will ensure no leaks or water are spouting out in the wrong directions! Finally, keep your screwdriver sharp by regularly honing its blade – this way, you’ll be able to remove and replace your outdoor faucet without any issues easily.
2. Use A Drill If The Outdoor Faucet Is On Your Exterior Wall.
If you have an outdoor faucet that is on your exterior wall and it’s time for a new one, there are a few steps you need to follow. First, you will need to find the right drill bit for plastic or metal water pipes. Once you have found this, unscrew and remove the old faucet by turning it anticlockwise with a wrench.
Then fit the faucet stem and washer onto the new water pipe using threading tape or putty before tightening with a wrench. Next, if the outdoor faucet is on your exterior wall, use a drill to remove it. Wear protective gear like goggles and ear protection when drilling into the pipe.
3. Don’t Twist The Spigot With Too Much Force.
Using the right tools and techniques is essential when repairing water faucets. If you don’t handle the repair correctly, it could result in a difficult or even impossible job.
Before getting started, clear all debris away from around the spigot with a hose. It will help prevent future plumbing problems and make repairs much easier. Next, take out your wrench and turn the spigot using its correct screwdriver – not your hand! Finally, a bucket is nearby in case of water leakage!
4. Keep The Water Pressure Low To Avoid Damaging Your Water Pipes.
To replace a spout on a water pipe, first, turn off the main water supply at the meter. Next, unscrew the faucet handle and remove it from the spout.
Lift out the old spout and replace it with a new one, ensuring it is correctly fitted and secured with screws. Loosen and remove retaining screws on either side of the spout using a Phillips head screwdriver before tightening all screws once the installation is complete.
5. Avoid Damaging Your Outdoor Faucet By Removing The Garden Hose Before Winter.
It is essential to take some precautions to avoid damaging your outdoor faucet during winter. First, fit the new faucet by tightening all the screws in a criss-cross pattern, ensuring they are evenly tightened.
Then unscrew the old faucet and the stem – make sure you get all the gunk and debris out before re-fitting. Finally, replace any washers or seals that may have been lost in the process and attach your garden hose if necessary.
How To Tighten Or Loosen The Outdoor Water Faucets
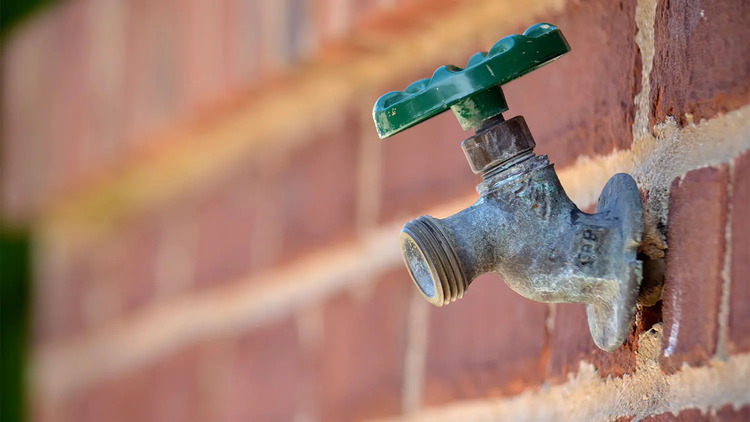
Outdoor water faucets can get a little tricky to work. That’s why it’s essential to tighten or loosen them. To tighten the faucet, make sure it’s slightly tight and turn it a quarter-turn more for extra security. If it’s difficult to turn, lubricate it with WD-40 and try again.
To loosen the faucet, turn it a half-turn and check that water flows freely from both washers and hoses. Finally, the faucet can easily be tightened or loosened using the handle on the side.
Tips For Washing The Faucet Body And Parts
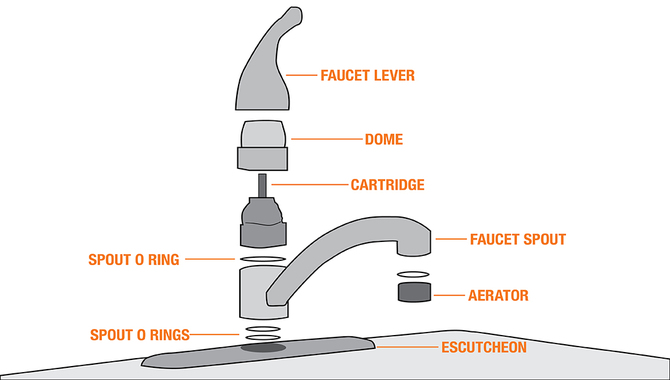
When it comes to outdoor water fixtures, keeping them spick and span is essential. One way to do this is by rinsing off the faucet body and parts before reassembling them together.
If algae or moss is on the faucet body, use a cleaner specifically designed for outdoor water fixtures. Also, use a hose to clean the faucet body and parts – this will remove any dirt and debris. Once everything is clean, it’s time to put everything back together and enjoy your water faucet in style.
Instructions
- Make sure the area around your faucet is clean and dry
- Remove the old hose attachment by unscrewing the thumbscrews and removing it from the valve
- If there is a threaded connector on top of your valve, remove it by unscrewing the hex nut and washer (if present)
- Reattach the new hose attachment to the valve stem using either a wrench or pliers, being careful not to cross-thread it
- Threaded connector should now be attached to both hose attachment and valve stem
- Place the valve cap on top of the valve stem and screw it in place using a hammer or screwdriver (if present)
- Replace the hex nut and washer if used, then tighten using a wrench or pliers
- Check for leaks and adjust accordingly
Benefits Of Outdoor Water Faucets
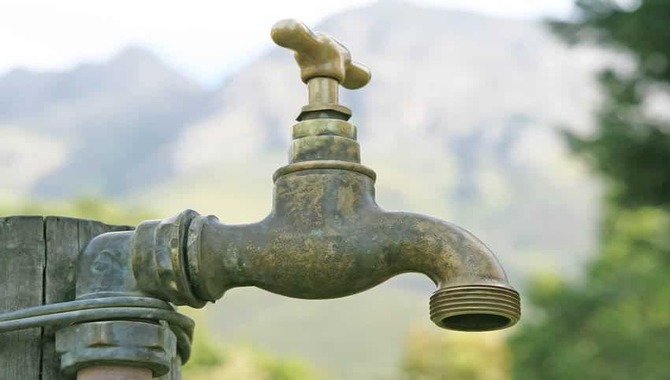
Regarding outdoor water faucet replacements, a few benefits should consider. Firstly, ensure you buy a faucet that complies with current water safety regulations. Additionally, always be careful when removing or installing the faucet – especially if it’s wet outside.
Finally, installing an outdoor water faucet can save you water and improve your home’s curb appeal. Remember that outdoor faucets are also a safety hazard, as they can easily fall off a deck or freeze in wintertime. So, whether you’re replacing an old outdoor faucet or just sprucing up your outdoor water supply, consider these benefits.
Conclusion
Replacing an outdoor water faucet is a simple task that can improve the aesthetics of your home while also ensuring water flow is adequate.
By following the instructions outlined in this blog, you’ll be able to replace your old faucet in no time. In addition to the faucet body and parts, wash the spigot and hose to keep them looking new. Thanks for reading, and we hope you found this post helpful!
Frequently Asked Questions
Q 1.What Are The Pros And Cons Of Installing An Outdoor Water Faucet?
Ans: Outdoor water faucets may have pros and cons, but the biggest pro is that they’re aesthetically pleasing. Not to mention, outdoor water faucets conserve water by using less water indoors compared to plumbing systems.
In addition, installing an outdoor water faucet can reduce the need for inside plumbing in your home or office.
Q 2.What Are Some Of The Best Ways To Keep Rainwater From Leaking Into My Home During Heavy Rainfall?
Ans: There are several ways to keep rainwater from leaking into your home during heavy rainfall. Here are a few of the most popular ones:
- Rain barrels can collect up to 50 inches of rainfall, allowing you to use them for irrigation purposes or drinking water. They make of plastic and metal tubes that connect from the roof down into the gutter, preventing rainwater from flowing onto the ground and causing flooding in your home.
- Gutter guards: Gutter guards are typically installed outside your home’s slope, near the downspouts, to prevent water from flowing down onto the ground and causing flooding in your home.
- Water faucets: One of the most common ways to replace an outdoor water faucet is by using a rain barrel. Alternatively, install a gutter guard to prevent water from spilling onto the ground and damaging your grassy yard.
Q 3.How Can I Repair An Outdoor Water Fountain Without Replacing It Completely?
Ans: There are many ways in which you can repair an outdoor water fountain without having to completely rebuild it. Here are a few of the most popular options:
- Use a metal frame and plastic cover: This option allows the fountain to be used as before while protecting the metal frame from rust.
- Use a temporary fix using some PVC piping and screws: This option is perfect if you only need the fountain to work for a short period while you figure out the permanent solution.
- Install an indoor water feature that uses the same plumbing system as your outdoor one: If you already have a plumbing system installed for outdoor water features, this is the option for you. Install an indoor water feature using the same plumbing system, and you’re good to go.
Q 4.Is There A Specific Type Or Brand Of Replacement Outdoor Water Faucets That I Should Buy?
Ans: There is no one-size-fits-all answer to this question, as the best replacement outdoor water faucet for you will depend on various factors.
However, if you are looking for an affordable and reliable option, then the Moen 6009SS may be a great choice. This faucet comes with a two-year warranty and makes out of durable stainless steel. Alternatively, consider buying the Aqua Sport Outdoor Drinking Fountain if you want something more unique and stylish.
Q 5.What Are Some Of The Most Common Causes Of Outdoor Water Faucets Not Working?
Ans: Some of the most common causes of outdoor water faucets not working are caused by corrosion on brass parts of the valve, line pressure not being strong enough, or washers on ball joints being seized up.
For order issues, you may need to clean the brass parts of the valve with a brass cleaner, upgrade your line if needed, install a booster station, or replace seized-up washers on ball joints.

Leave a Reply