Whether this is for home or workshop, sanding convex surfaces is always a tough job. Why is it tough? Well, people think skill is everything, but that is not always true.
Sometimes the machine makes the difference. The same things happened here; sanding a convex surface is not just about skill. It is also about finding the right sanders.
In this guide, we will show you almost all the essential sanders available. In addition, we will provide a detailed dissociation about each of the sanders, and talk about the price, quality, purpose, and priority. After reading this guide, you will understand when you need which sanders and the right sander to buy!
What Is Sanding The Convex Surfaces?
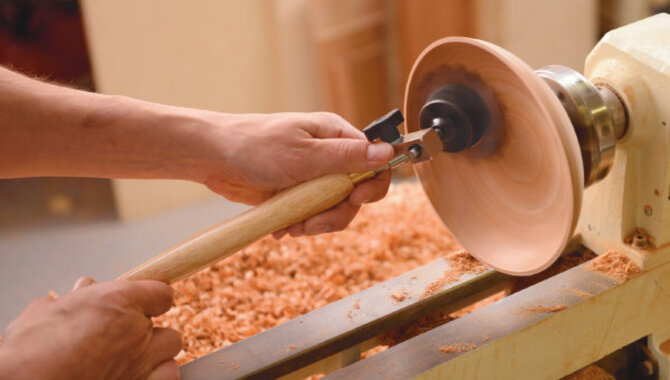
Before knowing what sanding convex curves is, first, you have to understand what sanding is. In other words, we can describe it as polishing or making any surface smoother using different types of things.
As a polisher, we use sandpaper, hard brush, masking tape, emery paper, etc. Alright, then what is a sanding convex surface then?
Simple, just polishing those surfaces which are bent or bulging means not that flat. So sanding a bulging surface is tough compared to a normally flat surface. So that is why we often face difficulties.
How difficult is it to sand the surface? What type of surface is very common for sand? Sanding a convex surface is not rocket science, but it is not like a cup of tea.
You need to maintain a few simple steps and need to be very serious while sanding. Most importantly as it is a kind of sensitive work and you can easily mess up, that’s why you have to be very careful.
Sanding Convex Surfaces In Different Methods
There are a lot of methods available that you can follow for people standing. Among all those sanding methods, some are easier to implement, and some are a little tricky.
But the most important thing is they are being used for different types of reasons. Here we are going to discuss some of the most common sanding methods that are very popular. Let’s take a look.
1. Sanding Drums
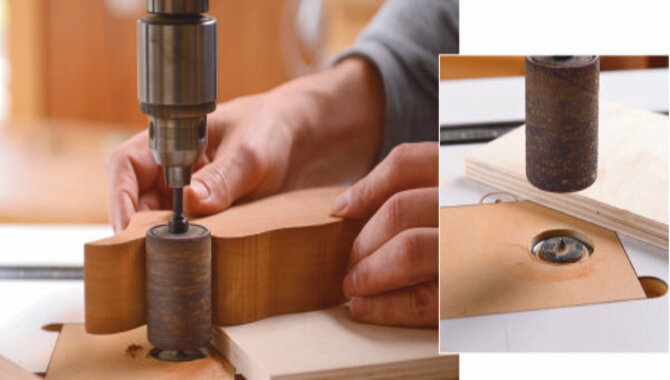
Undoubtedly this is one of the most popular methods of sanding among all other sander methods. The sanding drum shape is cylindrical.
Sanding drums size started from 9mm/13mm to 13mm/14mm. On the outer part of the drum, there is a rubbery layer attached for polishing or smoothing.
Different kinds and sized sanding drums are available. If you have any tool that allows a sanding pool, then you may use that for work.
But for the best performance, you always should go for the genuine machine. The machine is designed only for sanders, especially sanding drums.
Multiple types of caves are available in the market. You have to select them according to your preferences and needs.
Remember that with a smaller sanding drum, you will be able to sand the most curved surface. And with the larger sanding drums, you can easily sand the wider convex surface.
So what do you have to do! You have to buy a portable drill that has multiple functions that allow you to add different-sized drums. Additionally, you have to keep two different sanding drums.
One should be smaller in size, and the other should be larger. If you manage this stuff, you can easily be able to do your sanding in any situation.
When you add a sanding drum to a drill, the biggest problem you might face is sides pressure. And that is harmful to your tools.
So what do you have to do? In that case, it would be better to add an extra bearing or holder next to the sanding drum.
2. Flap Sanders
A flap sander is another important tool. This tool is being used after sanding an object. A flap sander is used to remove dust in the final stage. It can easily grind and shine the targeted object.
What does it look like? It looks like a moping wheel. It contains a corrosive body that constantly moves around and helps remove the final dust from the object.
Behind the scratcher, it also helps to get rid of unexpected lacerate and holes as these are heavy-duty sanders, so people like to use this with other heavy tools like drum sanders or related tools.
If you are a heavy user, you always have to maintain these steps. From time to time, you have to clean the stripe. When you use these sanders for a long time, some dust gets stuck inside the sanders.
So, in that case, you always have to remove the strips from the sanders, clean them out and relocate them to their previous place. When the strips go weak, then you must exchange them with a new stripe.
You are allowed to use these sanders for any typical drill. Make can be issued, so make sure you are using the right sanders. Depending on your work and object, you have to pick your sander’s size.
For heavy work, you really should purchase the bigger sanding drum. For bigger sanders finding the right drill would be an issue.
And for a tough finish, you need to purchase a smaller one. Smaller sanders are very handy. In addition, you can find the appropriate drill in any place.
Drum sanders have a lot of variety. If you are a professional user, you might need pneumatic drums. It’s a little costly but best buy for the money. You won’t regret it after purchasing the tool. For regular use, you can use the sleeveless one.
3. Angle Grinders
An angle grinder is a tool that has a handle on its side. Why does it contain a handle? It is because this is a heavy tool. So when you are going to use this, you have to hold it.
Otherwise, you will lose it for enormously moving. In addition, you won’t be able to use it properly without external support, so the manufacturer attached a handle.
This is honestly a very versatile tool, and people are allowed to use this for different kinds of work.
Besides cutting, it also grinds things, polishing and cleaning things, most importantly you can use this for sanding.
Do people often say this tool is used for cutting how it’s going to sand things? Well, though it is a popular cutting tool, still by changing its heads, you can use this for all other work.
Angel sanding tools get power from the battery, but as we have seen, the powerful angle sanding tool gets power from electricity.
When do we use the angle grinder? Well, suppose you just cut a piece of metal. Now you can use the angle grinder. You can now polish the edges of that steel so that it can be usable.
4. Hand Sander
Hand sander is a very basic sanding tool among all other tools. This tool comes with a simple design, normal mechanism, and cheaper cost. Hand sander can be used for any sanding work at home or even office.
Hand sanders are a manual functional tool, and the user needs to use their hand to sand things. Where can you use this? I have already said that this is a very basic tool and you can use this in any job.
We mostly use this to polish our old furniture, polish our window grill; we also use this to remove drywall. Besides all those, we also often use this to remove paint from walls and woods.
It can run with batteries as well as electricity. A drill that can set 0.25 shaft is suitable for this kind of sanding tool.
Here you can easily move the machine while cleaning out sanding. The problem is the process is a little hard and time-consuming. The rubber gets dirty very soon, so you always need to change that when needed.
5. Lathe Sanders
Let’s talk about some tough sanding tools. The lathe is an important sanding tool that professionals use, and it is used for a very specific purpose. The tools are incredibly, very powerful, and faster.
It can spin very powerfully. The speed spinning force helps eliminate many problems such as removing scratches from the object’s body, clearing the unwanted marks, and making a proper finish of the objects.
The tool is smaller in size. Frankly, it’s very handy to operate. It has two great functions that make this tool flexible. Its angle is adjustable, and the head is rotatable.
An adjustable angle helps you move when the object has a tough corner, and it’s pretty hard to reach.
The head rotatable function allows you to polish the object when the convex is even harder to reach. These two functions all together make this tool even more tough and useful.
Where should we use this? Well, this tool is mostly used for polishing work. So anything we can polish with this tool, but it would be better when you are polishing the wood.
The lathe sanding tool will come with many disks. And every dish has its special work. So you can change the dish depending on your needs.
Related: How To Dissolve Hardened Grease?
6. Tailed Sanding
Tailed sanding is one of the last-line tools that help to work in detail. What does that mean? So suppose you have already done your sanding, polishing, or grinding.
Now it’s time to do the final work because your object still has dents, scratches, and holes. So you need to polish that properly before final production.
So in this kind of case, most people make the mistake of suddenly buying the stand-alone function system. You know that it’s expensive. Buying the lathe sanders is an even better idea, and it can do more than you imagine.
The basic shape of this kit is like the tail because it is so thin and small. You can hold this kit like a pencil, and then you can work in detail.
It generally generates power through electricity. These tiny sanders can help you to finish your final work in a very short time. So this is a good option.
7. Sponge Sanders
Using sponges for sanding is the eldest and traditional method of sanding. This method has been used since when there were no sanding machines. What kind of sponges is being used here?
Frankly, these sponges are not regular cleaning sponges. They are very high-density base material sponges; these Sponge Sanders can be used on steel, wood, plastic, or even hard walls.
The operation is comparatively easier, but this method is time-consuming and hard. It will work properly, but you have to put in a huge amount of time.
So the thing is, by using your hand, you have to burnish or polish the area where the sanding is needed. The good thing is you can use it multiple times after sanding.
It is reusable and washable. You can also polish by wetting the sponges. Before buying your preferable sponges, make sure you buy the sponges which have more than 200 grit.
8. Customize Orbital Sanders
Besides all of these sanders, you can also use your customized or random sanders for more comfortable work.
What is the trick? So the idea is you can use very normal kinds of stuff like sandpaper or scratch paper.
So the thing is, you only have to manage the sandpaper or related stuff, and then you set these things on any orbital sanders. Though people often get confused about how this is going to work, fortunately, it’s perfect.
When you attach the sandpaper to the drill or any orbital sander, make sure you use the polyester foam. Why? Because it will help to stick the sandpaper to the orbital sander machine.
This is a very normal setup for simple and basic work. If you are a professional, it would be better to use a professional tool rather than this homemade stuff.
By the way, this random tool can do all your basic tasks without any doubt. As far we see that most people using this, and their feedback was awesome,
Sanding by angle grinders
There’s nothing like a well-sanded convex surface – it looks great and makes any piece of furniture look its best. But sanding convex surfaces can be a real pain, especially with traditional sanding methods. That’s where angle grinders come in – they’re a powerful tool that can get into tight spaces and produce high-quality results. By grinding at an angle, you can get into the nooks and crannies of convex surfaces and sand them to perfection in no time. With a bit of practice, you’ll be able to sand any surface easily with an angle grinder. Angle grinders are also great for sanding convex surfaces like wood, MDF, and other materials. So don’t wait any longer. Start sanding convex surfaces in effective ways today!
Using a Random Orbital Sander with Polystyrene
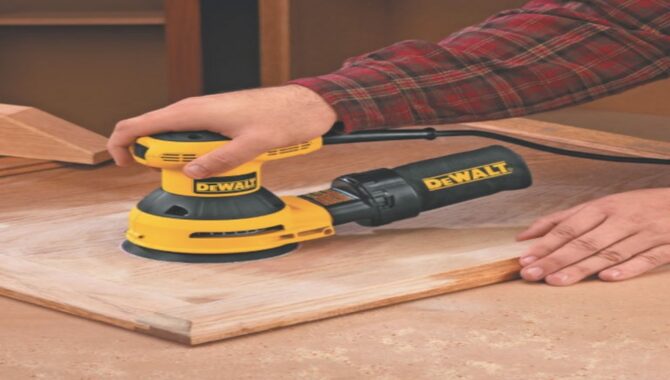
Convex surfaces like glass and mirrors can be difficult to sand down properly. That’s where the Random Orbital Sander with Polystyrene comes in handy.
This sander is more effective than ordinary sandpaper because it doesn’t create scratches or lines. Plus, it’s gentle on the surface and won’t melt the Polystyrene material.
Be patient while sanding – the Polystyrene will soften after a while if you use too much pressure or heat! After sanding, clean up your work area by wiping down the surface with a cloth dampened in water and acetone (or any household cleaner).
Using Sanding Drums Attach to the Drill Head
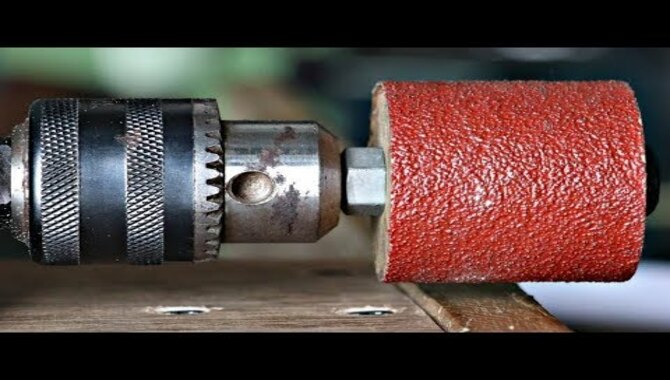
Sanding convex surfaces can be difficult, but using suitable sanding drums can make the job easier. Be sure to choose a Sanders suitable for the convex surface you are working with, including using a belt sander. It is important to sand the surface slowly and methodically to avoid further damaging it.
If attaching sanding drums to the drill head is not possible or desirable, use a low speed when drilling into the surface. Finally, the sanding drum attachment makes sanding the surface much more accessible.
Which Method Is Best For The Sanding Convex Surface?
That is a hard question first of all, and we don’t have only one answer. In terms of our different needs, we will tell you which one is best on which side.
Well, when you are looking for a sander that you will use for only basic work at home and office, we would recommend you pick either the hand sander or angle sander.
Why do we recommend this? It’s because these two sanders are much easier to use. Anybody can use this in their home.
At the same time, these two sanders have all the basic functions to send anything in your house. Last but not least, as we use the hand sander by hand, we can use this in a very easy way.
If you are looking for a sander that will be used for professional work, then we should recommend a drum sander and tails sanders.
They are well functioning, first of all. Secondly, they are tough and well built, so you better use the drum sanders when you do something serious and sensitive.
But when the question is about detailed work, then you really should pick the tails sanders. This tiny tool can do the most insane thing in a short time. It will help you to achieve all the detailed work.
Finally, when looking for the cheapest sanders for very basic work, you should go for either Sponge Sanders or Customize orbital sanders.
They are low-cost and easy to purchase. Though you have worked hard to get better results, you can do your work with this.
How to Sand Curved Wood Surfaces?
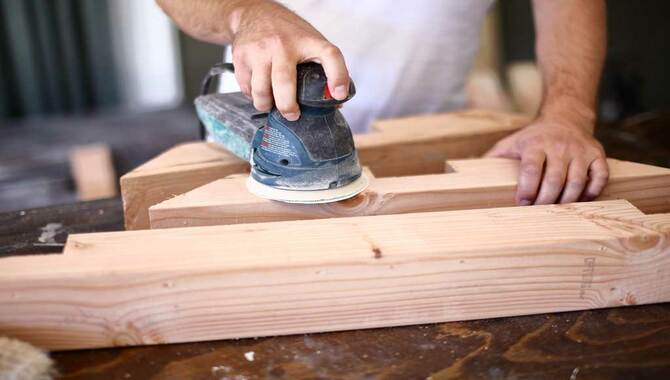
Sanding curved wood surfaces can be tricky, but it can be done quickly with the proper techniques. First, sand the entire surface at a low angle to remove sharp edges.
Then use a 180-degree angle to sand the surface smoothly and evenly. Finally, use wood glue and wood polish to finish the job. Always wear safety goggles and avoid breathing in dust when sanding curved wood surfaces!
Final Thoughts
Hope now you have the proper solution to your problem of finding the suitable sanding convex surfaces. We have discussed all the popular and non-popular sanders that are available in the market. We discussed the purpose of the sanders, we talked about the quality, and most importantly, we showed the main best sanders among all others in terms of their work. By analyzing the aspect, you can find your sander for your work.
Frequently Asked Questions
1.Which Is Considered The Best Sanding Technique?
Ans. It depends on the work. But if we focus more on the sanding quality and related stuff, we should mention the drum standings. It would be more appropriate if we attached wood filler on the drum head in exchange for rubber.
2.Which Sander Should I Buy For A Neat Finish?
Ans. There are many of them available. Tailed sanders, random orbital sanders, even flap sanders are great for the finish. But as we have seen earlier, people get satisfied with the random orbital sanders. This one is very good in terms of the sanding quality as it uses better quality sandpaper. But the tail and flap are not bad.
3.How Should I Handle Sharp Edges When Sanding Convex Surfaces?
Ans. Use a belt sander with a sanding belt that has an aggressive grit.
4.Is It Necessary To Use An Orbital Sander For This Type Of Work?
Ans. An orbital sander is not necessary, a hand sanding will work just as well. The information for this question is sourced from the woodworking forum.
5.What Are The Best Grits To Use When Sanding Concave Surfaces?
Ans. The grits you use on the surface you are sanding. For wood, use 180-grit sandpaper. For plastic, use 220-grit sandpaper.
6.What Types Of Materials Can I Sand With Sandpaper?
Ans. Some materials that can be sanded with sandpaper are wood, plastic, and metal. The source of information for this question is the sandpaper manufacturer’s website.
7.Why Are Sanding Convex Surfaces Important?
Ans. Sanding convex surfaces is important because sandpaper will not curl the surface of the wood. The sandpaper will only smooth out the surface.

Leave a Reply