Matching wood floor stains can be a tricky process, So it is essential to know how to match wood floor stains. The first step is to identify the type of wood you’re working with, as this will affect how the stain is absorbed and how it will ultimately look.
It’s also important to take into account any existing finishes or coatings on the floor, as these may need to be removed or sanded down before a new stain can be applied. Once you’re ready to start staining, it’s a good idea to test the color on a small, inconspicuous area of the floor first to ensure it matches the surrounding wood.
If necessary, you can adjust the color by adding more or less pigment to the stain mixture or by using a different type of stain altogether. Be sure to follow the manufacturer’s instructions carefully and apply the stain evenly with a clean, lint-free cloth or brush.

Understanding Wood Types And Grain Patterns

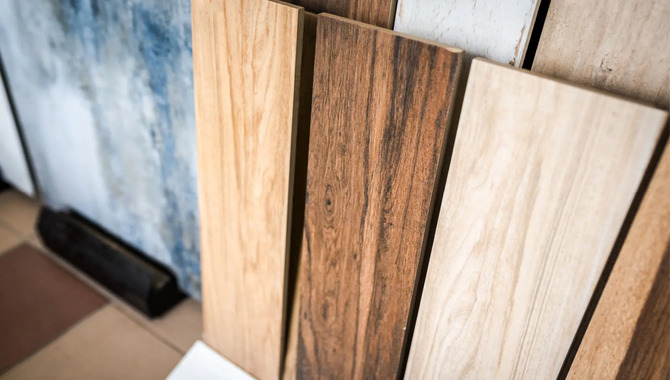
Anyone involved in woodworking or furniture making must understand wood types and grain patterns. Different types of wood have unique characteristics that affect their strength, durability, and appearance. Hardwoods like oak, maple, and cherry are dense and sturdy, making them ideal for furniture and flooring.
Softwoods like pine and spruce are lighter and more affordable, making them popular for construction and trim work.People prize exotic woods like teak, mahogany, and rosewood for their beauty and resistance to moisture and pests.
In addition to understanding wood types, it’s crucial to consider grain patterns when selecting lumber. The way a tree grows affects the direction and appearance of its grain.
For example, quarter-sawn lumber has a straight and uniform grain pattern, making it ideal for furniture with intricate details. Rift-sawn lumber has a tighter and more consistent grain pattern, making it ideal for flooring and cabinetry.
Factors To Consider When Choosing A Stain
1.When it comes to choosing a stain for your woodwork, there are several factors to consider.
2.You need to consider the type of wood you are working with. Different woods absorb stains differently, so choosing a stain that will work well with the wood’s natural grain and color is important.
3.You need to consider the level of protection you require.If you need to stain a piece of wood that will be exposed to the elements, such as an outdoor deck, you should use a stain that provides high durability and protection against UV rays.
4.You need to consider the look you are trying to achieve. If you want a natural look, a clear or transparent stain may be the best option, whereas if you want a darker, more dramatic look. you need to consider the application method. Some stains require multiple coats or special tools.
How To Match Wood Floor Stains – Step By Step
Matching wood floor stains can be daunting, but following a step-by-step process can help achieve a flawless finish. Here is a step-by-step guideline on how match wood floor stains.
- Gather supplies: Start by gathering all the necessary supplies, including the existing wood floor sample, stain samples, sandpaper, clean cloth, gloves, protective eyewear, and a brush or sponge applicator.
- Clean and prepare the wood: Clean the area of the wood floor you plan to stain. Use a vacuum or broom to remove any dust or debris. If there are existing finishes or coatings on the wood, consider sanding the area lightly to ensure proper stain absorption. Always follow the manufacturer’s instructions when sanding or preparing the wood.
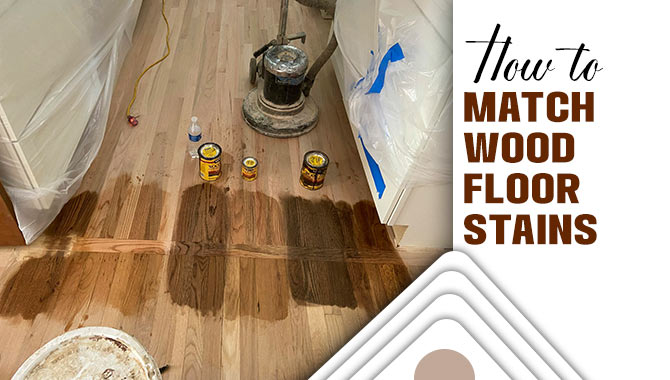
- Test the stain: Before applying the stain to the entire floor, it’s crucial to test it on a small inconspicuous area. This will help you determine if the stain color matches your desired outcome. Apply the stain to the test area, following the instructions on the product. Allow it to dry completely and assess the color. If it’s not satisfactory, try a different stain or adjust the application technique.
- Select the matching stain: Based on the test results, choose the stain that best matches the existing wood floor color. Take into account the wood species, age, and any natural patina that may affect the final color result.
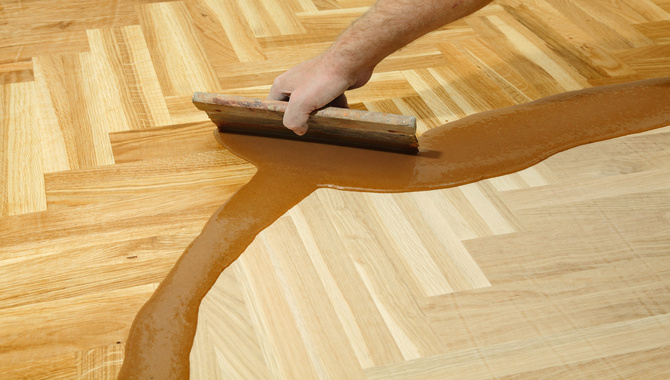
- Apply the stain: Once you’ve chosen the matching stain, carefully read the instructions provided by the manufacturer. Wear gloves and protective eyewear to avoid direct contact with the stain. Apply the stain evenly to the wood floor using a brush or sponge applicator, following the grain of the wood. Work in small sections to ensure consistent coverage and avoid overlapping.
- Wipe off excess stain: After applying the stain, use a clean cloth to gently wipe off any excess or pooling stain. This step helps achieve a more uniform color and prevents the stain from drying in uneven patches.
- Allow the stain to dry: Follow the manufacturer’s instructions regarding the drying time. It’s essential to allow the stain to dry completely before proceeding to the next steps, such as applying a sealant or finish coat.
- Evaluate the color match: Once the stain has dried, assess the color match against the existing wood floor. Compare it under various lighting conditions to ensure a satisfactory result. If needed, you can repeat the staining process with a different color or adjust the application technique until you achieve the desired match.
- Apply a sealant or finish: Once you’re satisfied with the stain color match, consider applying a sealant or finish to protect the wood and enhance its appearance. Follow the manufacturer’s instructions for the chosen sealant or finish product, ensuring proper ventilation during application and drying.
Preparing The Wood For Staining
Preparing the wood for staining is important to ensure a flawless finish. Sanding the wood to remove any rough spots or bumps is necessary before applying any stain. Sanding also opens up the pores of the wood, allowing the stain to penetrate evenly.
Using the correct sandpaper grit is important. Typically start with a coarser grit and working your way to a finer one. After sanding, it is important to remove any dust or debris from the surface of the wood.
A tack or soft, lint-free cloth is a great way to do this. If there are any knots or imperfections in the wood, it may be necessary to use a wood conditioner before staining. This will help to prevent the stain from soaking in too much and causing uneven coloring.
It is important to read the manufacturer’s instructions for the wood conditioner and stain to ensure the proper application and drying time. Once you properly prepare the wood, it is ready for staining.
Testing Different Stains

Testing different stains on a surface is an important process in determining the best stain to use for a particular project. People use stains to enhance the natural beauty of wood surfaces and to provide protection against damage caused by moisture, sunlight, and other environmental factors.
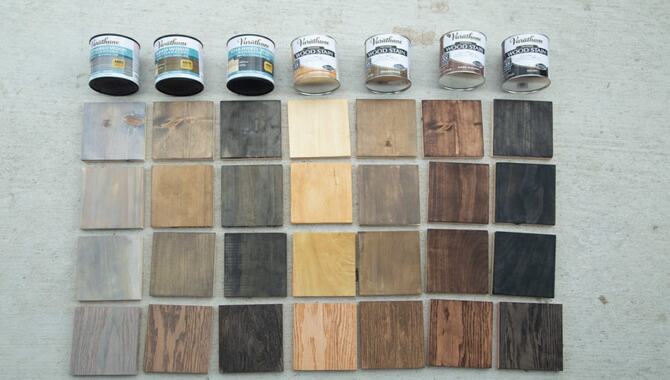
When testing different stains, you should consider factors such as the type of wood being used, the desired color and finish, and the application method. It is also important to use the same type of wood for each test to ensure that the results are accurate and consistent.
Several types of stains are available, including oil-based stains, water-based stains, and gel stains. Each stain type has advantages and disadvantages, and choosing the one that best meets your needs is important. Oil-based stains are durable and provide a rich, deep color, but they can be difficult to work with and may require more frequent maintenance.
Mixing Stains To Achieve A Desired Color
Mixing stains to achieve a desired color is a common practice in many woodworking projects. It allows for a greater range of color options and can result in a more personalized and unique finished product. However, it is important to understand the basics of color theory and how different stains interact with each other to achieve the desired hue.
When mixing stains, start with a base color and gradually add small amounts of the desired color until you achieve the desired shade. Keeping track of the ratios used is also important in case the same color needs to be replicated in the future.
One common mistake when mixing stains is to add too much color too quickly, resulting in an uneven or muddy appearance. It is better to add small amounts at a time and allow the stain to dry between each addition. This will allow for a more accurate representation of the final color.
Applying The Stain
Applying the stain is a crucial step in the process of refinishing wood furniture. Before beginning, it is important to properly prepare the surface by sanding it down and removing any dust or debris. Once you clean and smooth the surface, you can apply the stain using a brush, rag, or spray gun.
Following the manufacturer’s instructions for application and drying times is important to ensure optimal results. Working in small sections and avoiding overlapping strokes is important when applying the stain to prevent uneven coloring.
It is also important to wipe away any excess stain with a clean cloth to prevent blotches and streaks. You can apply a protective finish, such as polyurethane, to seal and protect the wood once the stain is dry.
The final result should be a beautiful and durable finish that enhances the natural beauty of the wood. With proper application techniques and attention to detail. Applying the stain can be a satisfying and rewarding experience for any DIY enthusiast or professional woodworker.
Drying And Sealing The Stained Floor

Drying and sealing the stained floor is an essential step in the restoration process. After removing the stains, it is important to let the floor dry completely before applying any sealant. This ensures that the sealant adheres properly and doesn’t trap any moisture beneath it.
Drying time can vary depending on the type of stain remover used and the humidity level in the room. A fan or dehumidifier can be used to speed up the process. Once the floor is dry, a sealant can be applied to protect it from future stains and wear and tear.
Choosing the right sealant is important to ensure optimal protection and longevity. Various options are available, including water-based, oil-based, and polyurethane-based sealants.
Each has its own pros and cons, and it’s important to weigh these when deciding which one to use. Once the sealant is applied, it’s important to let it cure for the recommended amount of time before walking on the floor or placing furniture.
Maintaining The Stained Floor
Maintaining the stained floor is a crucial aspect of preserving the beauty and longevity of your flooring investment. Regular cleaning and proper care can prevent stains, scratches, and damage to your floors.
First, it is important to sweep or vacuum the floor frequently to remove any dirt or debris that can scratch the surface. Additionally, using a damp mop with a gentle cleaning solution made specifically for stained floors can help maintain the integrity of the surface.
Be sure to avoid harsh chemicals, abrasive cleaners, and excessive water, which can cause damage to the finish. Consider using rugs or mats in high-traffic areas and placing furniture pads under heavy items to prevent scratches. It is also important to address spills and stains immediately to prevent them from penetrating the finish.
Use a clean cloth to blot the spill, rather than rubbing it, and apply a stain remover if necessary. Finally, you can help restore the original luster and maintain the durability of your floors by having them professionally cleaned and refinished every few years.
Conclusion
Knowing how to match wood floor stains is a crucial task that requires attention to detail and precision. The key is to take your time, test different stains, and make adjustments until you achieve the desired look. Additionally, it’s important to use quality products and follow manufacturer instructions for best results.
By following these steps, you can achieve a seamless and cohesive look in your home or business, adding value and beauty for years to come. Remember, it’s always wise to seek the guidance of a professional if you feel unsure or overwhelmed by the process.
FAQ
1.Why Is It Important To Match Wood Floor Stains?
Ans: Matching wood floor stains is crucial to achieving a cohesive and uniform look throughout your space, ensuring that different sections or planks of wood blend seamlessly.
2.Can I Match Wood Floor Stains If My Floors Are Already Installed?
Ans: Yes, it is possible to match wood floor stains even if your floors are already installed. However, achieving a close match might require more effort and expertise.
3.What If I Can’t Find An Exact Match For My Wood Floor Stain?
Ans: If you can’t find an exact match, consider using a similar color or opting for a complementary stain shade that blends well with the existing floor. Testing the new stain on a small sample area before applying it to the entire floor is important.
4.How Do I Ensure Consistent Stain Application Across The Entire Floor?
Ans: To ensure consistent stain application, thoroughly clean and sand the floor before applying the stain. Use a high-quality brush or applicator pad, and work in small sections, blending the stain evenly as you go.
5.How Long Should I Let The Stain Dry Before Walking On The Wood Floor?
Ans: The drying time for wood floor stain can vary depending on factors like humidity and temperature. Generally, allow at least 24-48 hours for the stain to dry completely before walking on the floor or moving furniture.

Leave a Reply