
Oak cabinets are popular with many homeowners due to their durability and timeless beauty. However, the wood grain on oak cabinets can become more noticeable over time and give a dated look to your kitchen or bathroom.
While completely replacing the cabinets may seem the only solution, a cost-effective alternative can give your space a new and refreshed look. Painting oak cabinets and hiding the grain is a popular technique that can transform the appearance of your cabinets without breaking the bank.
Here, we will discuss how to paint oak cabinets and effectively hide the grain to achieve a smooth and modern finish. So, let’s dive in and learn how to paint oak cabinets and hide the grain like a pro.

Project Tools & Materials For Painting Oak Cabinets
Before you begin painting oak cabinets, gathering all the necessary tools and materials is important. With all these tools and materials, you’ll be well-prepared to tackle your oak cabinet painting project and achieve a beautiful, grain-free finish. Here’s a list of what you’ll need:
- Screwdriver: To remove any hardware or hinges from the cabinets.
- Sandpaper: Choose a medium-grit sandpaper (around 120 grit) to roughen up the surface of the cabinets and remove any glossy finish.
- Tack Cloth: Use a tack cloth to wipe away dust or debris after sanding.
- Primer: Look for a high-quality primer specifically designed for painting the entire wood surface.
- Paintbrushes: Opt for high-quality brushes suitable for the type of paint you’ll be using.
- Paint roller And Tray: A roller can help you achieve a smooth, even finish on larger areas of the cabinets.
- Paint: Choose a paint specifically formulated for kitchen cabinets. Consider using a satin or semi-gloss finish for durability and easy cleaning.
- Painter’s Tape: Use painter’s tape to protect areas you don’t want to paint, such as countertops or walls.
How To Paint Oak Cabinets And Hide The Grain – Step-By-Step Tutorial

Painting oak cabinets can be a great way to update the look of your kitchen or bathroom. However, one challenge many people face when painting oak cabinets is hiding the grain. Oak has a grain pattern that can show through the paint, making the cabinets look textured. Painting oak cabinets and hiding the grain can be a great way to give your kitchen a fresh, updated look.
Oak cabinets are known for their distinct grain pattern, sometimes seen as outdated or undesirable. By painting the cabinets, you can easily transform the appearance of your kitchen and create a more modern and cohesive aesthetic. To hide the oak grain and achieve a smooth, professional finish, follow these step-by-step instructions on how to paint oak cabinets and hide the grain:
1.Gather Your Supplies

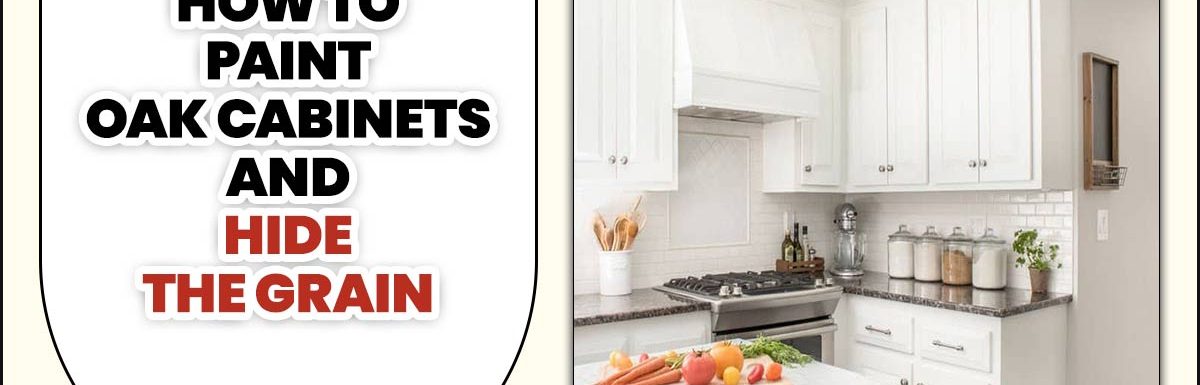
Oak cabinets need a primer to paint, and the primer’s colour will determine the paint colour you use. The cabinet needs to be well-coated with primer before painting begins. Once primed, the Paint Brush should cover the surface evenly without dripping or running. Avoid using dark paint colours on oak, as these may cause the wood grain to become more prominent over time. A white finish is recommended for oak wood cabinets.
2.Remove Everything From The Room

Removing everything from the room is important before you start painting oak cabinets and attempting to hide the grain. This includes any furniture, appliances, and decorative items that may be in the way. By clearing out the space, you will have a clean and clutter-free environment to work in, making the painting process much easier.
Additionally, removing everything from the room will help protect your belongings from any potential paint splatters or damage. So take the time to clear out the space before you begin transforming your oak cabinets into a smooth and sleek surface.
3.Remove And Number Doors & Drawers
For the cabinet painting project, we will apply primer to all surfaces. After that, it’s time to remove doors and drawers. To do this correctly and ensure symmetrical cabinets when re-attaching them later on, it is important to accurately measure the oak doors and drawers. Label each one with a number before you remove them from the cabinet. Be sure not to damage or stain the finish while taking them out – use gloves if needed.
4.Vacuum Cabinet Boxes And Wipe Down With TSP Substitute

Before you start painting your oak cabinets and hiding the grain, it is important to prepare the surfaces properly. One step in this process is to vacuum the cabinet boxes to remove any dust or debris that may be present. This will help ensure that the paint adheres smoothly and evenly.
Additionally, wiping down the cabinets with a TSP substitute can help remove any grease or grime that may have accumulated over time. This will create a clean surface for the paint to adhere to and can help improve the overall finish of your painted cabinets. By taking these steps, you can ensure that your oak cabinets are properly prepped and ready for painting and achieve a professional-looking result.
5.Remove All Of The Appliances
Before painting the cabinets, removing all the appliances is important. This will help you paint the cabinet doors and wood grain smoothly and tidily. It’s also important to take your time while painting. Even a small mistake can be noticeable, so move slowly and err on the side of caution. Plus, don’t forget to give the cabinets a good wash after painting – this will remove any paint or residue from the surface.
6.Seal Off Your Kitchen

Before you begin painting your oak cabinets and hiding the grain, it is important to seal off your kitchen properly. This step will help protect your countertops, appliances, and flooring from any potential paint splatters or drips. Start by removing all items from your cabinets and clearing the countertops.
Cover your appliances with plastic sheeting or drop cloths to prevent accidental damage. Use painter’s tape to secure the edges of the plastic or drop cloths and create a barrier between the cabinets and surrounding surfaces. Taking the time to seal off your kitchen properly will ensure a cleaner and more efficient painting process.
7.Sand Cabinet Faces With 80 Grit Sandpaper
The cabinet doors should be the focal point of your sanding project, so take the time to get them just right. Begin by priming the entire cabinet with a coat of primer. This will help the paint stick to the wood and protect it from sandpaper scratches. Next, paint the doors and other high-traffic areas using a base color.
Ensure you use two or three shades of light oak for depth and variation in your cabinets. Once the doors are painted, finish using 80-grit sandpaper to smooth out any bumps or imperfections in your fresh paint job. Be careful not to overdo it – too much sanding can result in rough-grain wood surfaces that look unfinished and dingy.
8.Fill In Grain And Imperfections With Drydex And A Putty Knife

If you’re looking to paint oak cabinets and hide the grain, one effective technique is to fill in the grain and imperfections with Drydex and a putty knife. Oak cabinets often have a distinctive grain pattern that can show through when painted, so filling in the grain can help achieve a smoother finish. Start by applying a thin layer of Drydex over the surface of the cabinets using a Wood putty knife.
Make sure to work it into the grain and any imperfections, smoothing it out. Allow the Drydex to dry completely before sanding it down with fine-grit sandpaper to create an even surface. This will help minimize the appearance of the grain and create a more polished look once you apply your paint.
9.Sand With 220 Grit Sandpaper
One essential step in painting oak cabinets and hiding the grain is to sand them with 220-grit sandpaper. Sanding helps to smooth out any rough areas and creates a better surface for the paint to adhere to. When sanding, it’s important to go toward the wood grain to avoid damaging the surface.
Start by lightly sanding the cabinets, focusing on areas with visible grain. This will help to level out the surface and minimize the appearance of the grain once painted. Be sure to wipe away any dust or debris before moving on to the next step in your cabinet painting process.
10.Sand With 320 Grit Sandpaper

Sanding with 320-grit sandpaper is crucial when painting oak cabinets and trying to hide the grain. This fine-grit sandpaper helps smooth the wood’s surface, creating a more even and polished finish. By sanding with a higher grit, you can remove any roughness or imperfections in the wood, allowing for better adhesion of the paint and a smoother final result.
Be sure to sand in the direction of the grain to avoid causing any damage to the wood. After sanding, thoroughly clean off any dust or debris before priming and painting your cabinets.
Other Techniques To Hide The Grain Of Oak Cabinets
In addition to painting oak cabinets, other techniques can help hide the grain and achieve a smoother finish. One option is to use a wood filler or putty to fill in the grain before painting. This can help create a more even surface and minimize the appearance of the grain.
Another technique is to sand the cabinets between coats of paint, using fine-grit sandpaper to smooth out any imperfections and create a smoother finish. Additionally, applying multiple thin coats of paint rather than one thick coat, can also help minimize the visibility of the grain.
Alternative Options To Consider If You Don’t Want To Paint

If you’re not a fan of painting oak cabinets and want to explore alternative options, several choices are available. One option is to apply a gel stain, which can help darken the wood’s colour and hide the grain. Another option is to use a wood grain filler, which can fill in the grain and create a smoother surface for Painting cabinets.
Additionally, you could consider using a vinyl wrap or adhesive paper to cover the cabinets, giving them a fresh new look without needing paint. Ultimately, the choice will depend on your preference and desired outcome for your oak cabinets.
Conclusion
Transforming your oak cabinets into a sleek and modern look is easier than you might think. Following this information step-by-step tutorial, you’ll learn how to paint oak cabinets and hide the grain for a smooth and professional finish.
Whether you want to update your kitchen or bathroom, painting oak cabinets can completely change the space’s aesthetic. With the right techniques and products, you can achieve a flawless result that will leave your cabinets looking brand new. Don’t let the grain of your oak cabinets hold you back from achieving your desired look.
Frequently Asked Questions
What Primer Hides Wood Grain?
A high-quality primer designed for wood surfaces can help hide solid wood grain by filling in the pores and creating a smooth surface for paint application.
What Is The Best Color To Paint Oak Cabinets?
The best colour to paint oak cabinets depends on personal preference and the space’s overall aesthetic. However, popular choices include neutral tones such as white or gray, which can help brighten the room and create a modern, clean look.
What Is The Best Way To Paint Oak Cabinets?
The best way to paint oak cabinets is to thoroughly clean and sand the surface to remove any dirt, grime, or existing finish. Then, apply a coat of primer specifically designed for oak or wood surfaces.
How Do You Make Oak Cabinets Look Natural?
To make oak cabinets look natural, thoroughly clean them with a mild cleaner to remove dirt or grime. Then, lightly sand the surface to remove any existing finish or imperfections.
What Kind Of Primer Should Be Used On Oak Cabinets?
For oak cabinets, it is recommended to use a high-quality wood primer specifically formulated for use on oak surfaces. This primer will help seal the wood species and prevent tannin bleed-through, common with oak.
Leave a Reply