
Mortar is a popular adhesive used in tile installation. However, over time mortar can become attached to the tile back and cause problems during tile installation and repair.
This blog outlines the benefits and disadvantages of using mortar for a tile back and solutions and tips for removing mortar from the tile back for reuse. By understanding the pros and cons of mortar usage, you can make informed decisions about whether or not to use it during tile installation or repair.

What Is Mortar?
Tile back is a great way to update old or tired tiles without starting from scratch. However, before you can reuse it, removing the mortar is essential. Mortar is a compound made of sand, lime, and water and is used to hold tiles in place on the wall.
It’s necessary to remove mortar before reuse, so your new tile will look perfect. There are several methods to do this – with a power drill, chisel, or hammer. Be sure to use safety precautions when removing mortar from tiles – it can be dangerous if not done correctly! Now that you know what mortar is and how to remove it, it’s time to get busy and update your tile!
Advantages Of Using Mortar For A Tile Back

Tile backs are a popular way to add a bit of personality and style to a room. However, over time mortar can start to form, and the tile back can become a nuisance. If you’re looking to reuse mortar or remove it from the tile back for reuse, there are a few advantages to doing so. For one, mortar is an adhesive that helps to keep tiles together and in place.
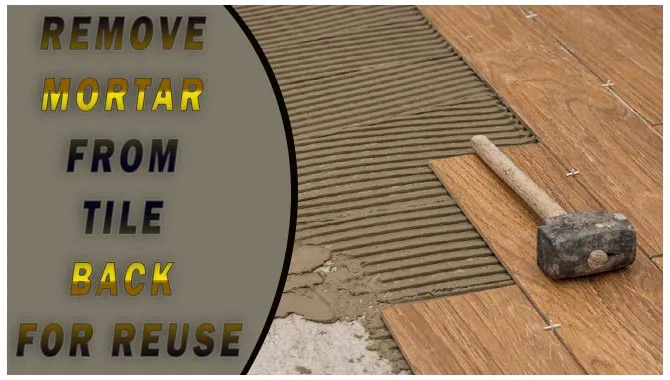
Additionally, removing mortar from the tile back is a quick and easy process that can use for various purposes. Recent project? Remove mortar from tile back for reuse and install tile back stickers! You can also use mortar for other purposes like this tile back project, where it’s removed from the wall easily.
Not only does this save money, but it also reduces wastefulness. So, next time you need to remove mortar from the tile back, make sure to try this simple and easy process.
Disadvantages Of Using Mortar For A Tile Back

Tile backs are a great way to add a bit of pizzazz and durability to your home décor. However, using mortar for the tile back is not the best option. There are several disadvantages to using mortar, the most important of which is that it’s expensive, time-consuming, and doesn’t last long.
When removing mortar, use a PB Blaster or proper adhesives. Be careful when prying the tile off the backer board – it may break if mishandled! If you still want to use mortar for tile backs, read the instructions thoroughly and choose the right type for your project.
Solutions To Removing Mortar From Tile Back
Mortar can be a pain to remove from the tile back, but there are several solutions that you can try. Here are three of the most common:
- Use a vacuum cleaner: This is the simplest and most common way to remove mortar from the tile back. Put the vacuum cleaner attachment on your hose and turn it on to full power. Run the hose over the mortar until it’s all gone, then clean up any excess debris with a cloth or sponge.
- Use an adhesive remover: Another option is to use an adhesive remover like Tilex. Apply the remover to the mortar, wait 15 minutes, then scrub it off with a brush. Be sure to wear gloves and Safety goggles to avoid getting any of the product on your skin.
- Use boiling water: Boil a pot of water and pour it over the mortar until it’s covered. Let it sit for 10 minutes, then take off the cover and Scrub it off with a brush. Be careful not to get any of the hot water on your skin or furniture!
Tips For Removing Mortar From Tile Back For Reuse
Mortar is an adhesive that use to hold tiles together. It’s usually applied between the tiles and the flooring, and it helps to create a smooth surface.
However, mortar can be difficult to remove, and it can be a significant pain to use. If you’re looking for a way to reuse your mortar tiles, you’ll need to find a way to remove them. Here are some tips:
- Use a water hose: Add some cold water to your hose and turn it on full blast. This will help break up the mortar and make it easier to remove.
- Use a vacuum cleaner: Another way to remove mortar is by using a vacuum cleaner. Just place the tile back on the suction tube and let it work its magic!
- Use an electric drill: Finally, if all else fails, you can use an electric drill. Make sure you have enough room around the tile, so you don’t lose too much of your tile back in the process.
Guidelines For Removing Mortar From Tile Back
If you’re looking to reuse a tile back that has mortar on it, there are a few guidelines that you need to follow. The first and most important thing is ensuring the mortar is completely dry. It will be difficult to remove if it’s still wet, and the tiles may not be stable once installed.
Try using a hairdryer or an oven set to low heat, but avoid using harsh chemicals or abrasives. Finally, wear gloves and protective eyewear when working with mortar.
Once the mortar is dry, you can start by removing the top layer of cement with a wire brush or stiff piece of wire. Be sure to scrub the surface until all of the glue is gone. If there are any residual glue pieces, use a sandpaper block or grater to remove them. You can seal the surface with a coat of paint or sealant.
Conclusion
Mortar is an adhesive that attaches tiles to the back of a wall or floor. While it has many advantages, such as being waterproof and easy to clean, mortar can also be a major inconvenience when it needs to remove.
In this blog, we have outlined the different solutions for removing mortar from the tile back for reuse and helpful tips for getting the job done quickly and easily. So, whether you need to remove mortar from a tile back for a new project or want to save it for future use, read on for all the information you need!
Frequently Asked Questions
1.How Do I Remove Mortar From The Tile Back For Reuse?
Ans: If you’re looking to reuse your old tile, you first need to remove all of the mortar from it. There are various ways to do this, but be careful not to damage the tile with harsh chemicals or tools. Once the cannon removes, you can start fresh by installing new tiles!
2.Is It Safe To Use A Saw When Removing Mortar From The Tile Back?
Ans: When removing mortar from the tile back, always use caution and wear protective equipment accordingly. If the mortar doesn’t release quickly, it is safe to remove. However, it is best to consult a professional if you are unsure.
Mortar can cause significant damage if it comes into contact with skin or eyes; avoid contact by wearing gloves and eye protection when performing this task. If the connection does occur, flush immediately with plenty of water for 15 minutes to remove any potential chemicals that could harm your health.
Finally, always use proper safety gear, including a saw, when working with any tool. Make sure you are using the correct size and cutting angle for the saw you are using, and be aware of your surroundings at all times.
3.What Are Some Of The Best Tools For Removing Mortar From The Tile Back?
Ans: Consider using a wire brush to clean up any adhesive residue and remove mortar from the tile back. This tool can help to clean up any objectionable material left on the tile back. Next, consider using a tile saw to cut through mortar and other Tile Back adhesive layers.
This will make it easier for you to clean up the area and remove any remaining adhesive. Finally, pipe cutters can help cut through mortar and other Tile Back adhesive layers. Doing so will allow you to more easily access the tile back and clean it up without damaging it.
4.How Can I Remove Mortar From The Tile Back For Reuse?
Ans: To remove mortar from the tile back for reuse, first wet the tile back thoroughly and then scrub it with a wire brush. Next, blast away loosened mortar using a Hydro Blaster until only clean, intact tiles remain.
5.Can I Use Old Mortar To Repair Or Replace New Mortar In A Tile Back?
Ans: No, it would help if you always used new mortar in a tile back. Old mortar may not adhere properly to the surface and could cause future problems.
Leave a Reply