
Creating a smooth and flawless wall surface may seem daunting, but anyone can achieve a professional-looking finish with the right techniques and tools. Whether preparing to paint, wallpaper, or simply want to give your walls a refreshed appearance, spackling and sanding are key steps.
These techniques help to fill in any imperfections, cracks, or holes on the wall surface and create a smooth and seamless finish. However, it is important to approach spackling and sanding with precision and patience to avoid any mistakes or uneven results.
Here, we will guide you through how to spackle and sand walls for a smooth finish, along with tips and tricks to ensure a flawless finish. So, say goodbye to bumpy and uneven walls, and get ready to learn the art of spackling and sanding for a smooth and professional-looking wall surface.

What Is Spackling, And Why Is It Necessary?
Spackling is a technique used in wall preparation to achieve a smooth finish. It involves applying a compound, typically made of gypsum or joint compound, to fill in any small holes, cracks, or imperfections on the wall’s surface. Spackling is necessary because it helps create a seamless and uniform base for painting or wallpapering.
By filling in these imperfections, spackling ensures that the final result looks professional and polished. It also helps prevent further damage to the wall by sealing gaps or cracks that could worsen over time. So, spackling is essential to achieve that flawless finish, whether you’re embarking on a DIY home improvement project or preparing your walls for a fresh coat of paint.
5 Steps On How To Spackle And Sand Walls For A Smooth Finish

Achieving a smooth finish on your walls can make a big difference in the overall appearance of a room. Spackle and sand are essential tools for achieving a smooth finish on walls. Spackle is a putty-like substance that fills in small holes, cracks, and imperfections in the wall surface. Once the spackle has dried, sanding is necessary to create a smooth and seamless finish.
By following these steps, you can achieve a professional-looking smooth finish on your walls that will enhance the overall aesthetic of your space. Here are five steps to follow for spackling and sanding walls to achieve that desired smooth finish:
1.Gather The Necessary Tools And Materials

Before you begin spackling and sanding your walls for a smooth finish, gathering all the necessary tools and materials is important. Gathering these tools and materials beforehand ensures you have everything you need to spackle and sand your walls effectively for a flawless finish. Here are some essentials you will need:
- Spackle or joint compound
- Putty knife
- Sandpaper
- Sanding block or sanding sponge
- Drop cloth or plastic sheeting
- Safety goggles and mask
2.Preparing The Surface For Spackling
Before you begin spackling your walls, properly preparing the surface for a smooth finish is important. Start by removing any loose or flaking paint with a scraper or sandpaper. Next, clean the walls thoroughly to remove any dirt or debris that could interfere with the adhesion of the spackle. You can use a mild detergent and water solution for this.
Once the walls are clean and dry, inspect them for any holes, cracks, or imperfections that need to be filled with spackle. Use a putty knife or a spackling knife to apply a thin layer of spackle over these areas, making sure to fill them completely. Allow the spackle to dry according to the manufacturer’s instructions before sanding for a smooth finish.
3.Applying The Spackle To Fill In Any Holes Or Imperfections

Properly applying spackle is key to achieving a smooth finish on your walls. Spackle is a putty-like substance that can fill any holes or imperfections in your walls. To begin, clean the area you plan to spackle and make sure it is dry. Then, using a putty knife, apply a thin layer of spackle to the hole or imperfection, making sure to spread it evenly and smoothly.
Allow the spackle to dry completely before moving on to the next step. Once dry, use sandpaper to gently sand down the spackled area until it is smooth and flush with the surrounding wall surface. This will ensure that your walls have a seamless and professional-looking finish.
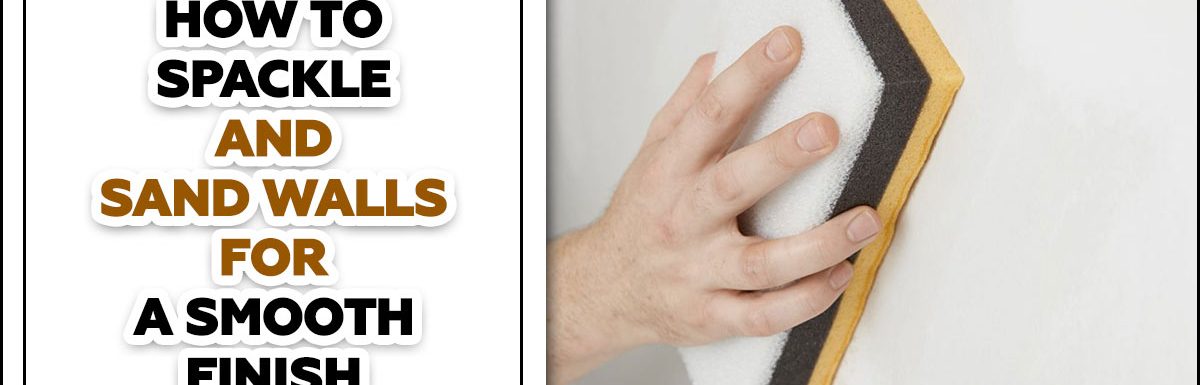
4.Sanding The Spackled Areas For A Smooth Finish

Once you have applied spackle to repair any holes or imperfections on your walls, the next step is to sand the spackled areas for a smooth finish. Sanding helps to blend the spackle with the surrounding wall surface and create a seamless look. Start using a fine-grit sandpaper or sanding block and gently sand the spackled areas in a circular motion.
Be careful not to apply too much pressure, which can damage the wall surface. After sanding, wipe away any dust with a damp cloth or sponge. Repeat the process if necessary until you achieve the desired smoothness. This step is crucial in achieving professional-looking walls ready for painting or wallpapering.
5.Cleaning Up And Finishing Touches
After spackling and sanding your walls, it’s important to take the time to clean up any dust and debris before applying the finishing touches. Use a vacuum or broom to remove loose particles from the floor and surrounding areas. Next, wipe down the walls with a damp cloth or sponge to remove any remaining dust.
This will ensure a smooth surface for painting or wallpapering. Once the walls are clean, you can apply a primer or sealer to prepare them for the final coat of paint or wallpaper. These extra steps during the cleanup process will help you achieve a professional-looking finish for your walls.
How To Use Spackle And Sandpaper?

Spackle and sandpaper are two essential tools for any DIY project involving walls. Spackle, or joint drywall mud compound, is a versatile substance used to fill in holes, cracks, and other imperfections on walls. Finishing up a wall or ceiling job can be tedious and time-consuming, but it’s well worth the effort. To ensure a smooth finish:
- Start by sanding the surface to be spackled.
- Use the right amount of sandpaper to achieve the desired level of smoothness.
- Apply shackle to the wall in the desired location.
- Fill in any holes and cracks, and smoothen the surface with a sanding damp sponge.
- Use a finishing coat of sandpaper to achieve the desired finish.
- Avoid any mistakes – the last thing you want is to face a wall that needs major repairs later.
How To Spackle Drywall Holes
Spackling drywall holes is essential in achieving a smooth finish on your walls. To begin, gather the necessary materials: spackling paste, a putty knife, sandpaper, and a damp cloth. Start by cleaning the area around the hole to remove dust or debris. Then, using the putty knife, apply a small amount of spackling paste to the hole, filling it.
Smooth the surface with the putty knife, ensuring it is flush with the surrounding wall. Allow the Spackle to dry completely before moving on to the next step. Once dry, use sandpaper to lightly sand down uneven areas until they are smooth and level with the rest of the wall.
Finally, wipe away dust with a damp cloth for a clean finish. These steps will help you achieve a professional-looking result when spackling compound drywall holes.
Pros And Cons Of Spackling And Sanding Walls

Regarding achieving a smooth finish on walls, spackling and sanding are two common techniques that can be used. Spackling involves filling in any cracks, holes, or imperfections on the wall with a compound, while sanding helps to create a smooth surface by removing any rough patches or excess Spackle. Here are some pros and cons of spackling and sanding walls:
Pros Of Spackling:
- It can effectively fill in small cracks and holes.
- Easy to apply and can be done by DIYers.
- Dries quickly, allowing for faster progress.
Cons Of Spackling:
- It may require multiple applications for larger or deeper imperfections.
- It can shrink or crack when drying, requiring additional layers.
- Requires sanding after application for a smooth finish.
Pros Of Sanding:
- It helps to create a smooth and even surface.
- Removes excess Spackle or paint for a clean finish.
- It can improve the adhesion of paint or wallpaper.
Cons Of Sanding:
- It is a time-consuming process, especially for large areas.
- Generates dust and debris that needs to be properly managed.
- Requires proper technique to avoid damaging the entire wall surface.
Tips For Preventing Any Problems While Using Spackle And Sand

Regarding spackling and sanding walls for a smooth finish, a few tips can help prevent any problems. By following these tips, you can achieve a professional-looking result when spackling and sanding walls for a smooth finish. Here are some key points to keep in mind:
- Prepare The Surface: Before applying Spackle, ensure the wall is clean and free from loose paint or debris. This will ensure that the Spackle adheres properly.
- Use The Right Tools: Invest in high-quality spackle knives and sandpaper to achieve the best results. The size of the spackle knife should correspond to the size of the area you’re filling.
- Apply Multiple Thin Layers: Instead of trying to fill a large hole or crack with one thick layer of Spackle, apply several thin layers. This will help prevent shrinkage and cracking as the Spackle dries.
- Sand With Care: Use fine-grit sandpaper to smooth out uneven areas once the Spackle is dry. Be gentle and use light pressure to avoid damaging the surrounding wall.
- Prime Before Painting: It’s important to prime the repaired area to ensure a seamless finish before applying paint. This will also help the paint adhere better and prevent future peeling or cracking.
Conclusion
Achieving a smooth finish on your walls is essential in creating a polished and professional look for your space. Following the steps outlined on spackle and sand walls for a smooth finish, you can learn how to spackle and sand walls effectively, ensuring that any imperfections are smoothed out and ready for painting or wallpapering.
Each step is crucial in achieving a flawless result, from preparing the surface to applying the Spackle and finishing with sanding techniques. So whether you’re tackling a DIY project or working with a professional, mastering the art of spackling and sanding will give your walls that smooth finish you’ve dreamed of. Get started today and transform your space into a work of art.
Frequently Asked Questions:
How Do You Smooth A Spackle Wall?
To smooth a spackle wall, sand the surface with fine-grit sandpaper to remove rough patches or high spots. Use a sanding block or sanding pole for larger areas. Once the surface feels smooth, wipe off the dust with a damp cloth.
How Do You Sand Walls After Spackle?
After spackling a wall, allow the compound to dry fully. Then, use fine-grit sandpaper or a sanding block to sand the wall’s surface in a circular motion gently. Start with light pressure and gradually increase if necessary.
What Do You Smooth Spackle With?
Smooth Spackle is typically smoothed with a putty knife or a trowel. These tools are designed to spread and level the Spackle across the surface evenly, ensuring a smooth and seamless finish.
How Do You Smooth Out Spackling Paste?
To smooth out spackling paste, use a putty knife or a drywall trowel to gently scrape off any excess paste and create a smooth surface. Apply even pressure and use long, smooth strokes to blend the spackling paste with the surrounding wall.
How Do You Make Spackle Look Good?
To make the Spackle look good, ensure the surface is clean and smooth. Apply a thin layer of Spackle using a putty knife, feathering the edges to blend it with the surrounding area. Let it dry completely, then sand it gently with fine-grit sandpaper to create a smooth finish.
Leave a Reply