It will draw your attention if a precious old painting needs a new touch or polish. You never allow a dull art piece to reduce the elegance of your interior decoration. But a precious and memorable painting should not be thrown away only because of its faded-out look. A Liquid Sander deglosser will pave the way for giving a new look to your favorite painting.
To have a new fresh coat to the old painting, you must have to apply a deglosser to rag the art. A Liquid Sander deglossers will serve you the best for the whole operation. The procedures of using Liquid Sander deglosser are not so much hard to follow. There are many handy and effective using methods of a deglosser. Let’s learn details about how to Use Liquid Sander deglossers.
Your old painting needs a fresh new coat of paint, looking for ways to do it? Or maybe you’re just tired of cleaning dirt and dust off your liquid sander every time you use it? No problem, we’ve got the solution for you! In this blog post, we’ll explain what liquid sander deglosser is and why it’s so important.
We’ll also cover how it works and what kind of effects it has on paintings. Finally, we’ll provide you with instructions on how to use liquid sander deglosser, so that you can get the most out of it.
Liquid Sander Deglosser and its Uses:
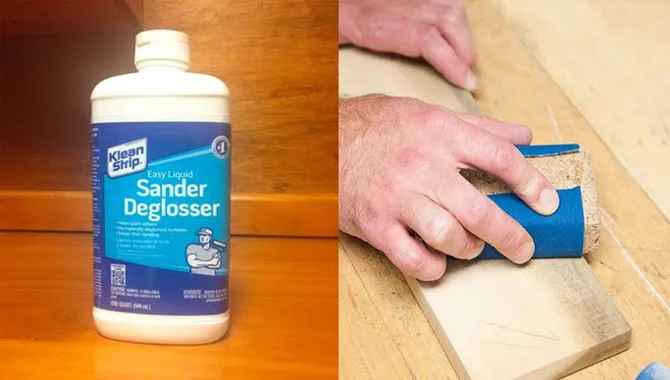
A passionate artist or an enthusiast must have a proper idea about Deglosser. It is the most important chemical material to keep the freshness of the art for long days. It makes you remove the glossy layer from a previously painted object so that you can give a new look to the object.
The chemicals are used to prepare Liquid Sander Deglosser are ethyl acetate, ethyl alcohol, and naphtha. Moreover, the chemicals like TSP (trisodium phosphate) are also used to make this deglosser. Though Liquid Sander Deglosser does not smoothen the surface, it will help to correct any details of the painting.
It removes the gloss of the surface, but you can’t use it as the primer. It’s also known as wet sanding. You can use it on your favorite painting, furniture, trim, and kitchen cabinet. A deglosser is used to demolish the shining effect of the wooden furniture or any other art pieces. You can use it to touch up an old art piece. It helps to refurbish a sealed painting or furniture with chemical reactions.
The procedures of using Liquid Sander Deglosser in various objects are different. Here you will get a proper direction of applying the Deglosser safely to get a better outcome.
Cautions
There are some cautions that you have to follow while using deglosser. To protect your skin, eyes, and light, you have to measure the safety lines of using the diglosser. The cautions are:
- Deglosser may have a thick Hume, which is harmful to the lungs. So, the low VOC is used to reduce the smell of the color in a deglosser.
- Try to conduct the whole operation of degassing in an open area so that the sanding dust can’t reach your eyes or skin.
- Try to get the necessary protection wear like gloves, mask and eye protector.
- Suppose it is possible to check the chemical reaction of the deglosser.
- Some paint contains lead which may react in the presence of deglosser.
How To Use Liquid Sander Deglosser?
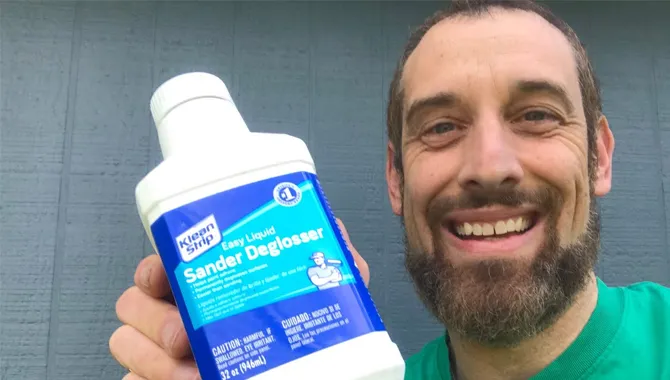
Liquid Sander Deglosser serves multiple using purposes for the paints. Before going for the applying steps, you have to collect some important materials. These are:
Materials:
⦁ Liquid Sander Deglosser
⦁ lint-free fabric
⦁ lint-free cotton
⦁ soap
⦁ Freshwater
⦁ Air drier
Procedures
Applying Liquid Sander Deglosser is an easy operation. Now the elements are in your hand for final procedures. To apply it, you have to follow some easy steps carefully. Let’s dive deeper into the steps:
Step 01:Prepare the Selected Surface
The aim of using the deglosser is to demolish the glossy effect of the painted wall or home decor. You have to apply it a bit carefully. Cleanliness is the very first requirement of applying a deglosser. Before using a deglosser, make sure that you wash the dust off the surface.
Fabric is renowned used to remove grins, but if you don’t find it effective, you can try your own way for washing.
You also can use soap and water to clean the surface dust. There are no restrictions on using hand soap or dishwashing soap for cleaning purposes.
Step 02:Leave the Area to Dry:
To get the effectiveness of the deglosser, you have to dry the surface very carefully. After washing the area, you have selected to apply deglosser, let it aside to dried.
If any moisture leaves on the surface, the deglosser cannot work properly. You can use an air dryer also if it is needed or if you have a shortage of time.
Step 03:Application of Liquid Sander Deglosser
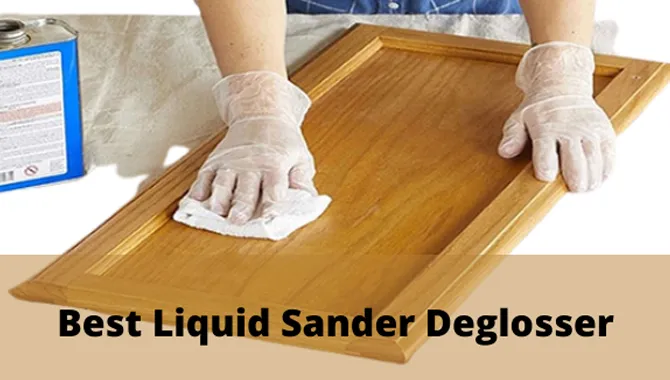
Application of Liquid Sander Deglosser is easy and handy. First of all, you have to take a lint-free fabric. Have some liquid sander on the fabric and spread it over the whole fabric.
It’s time to rub the fabric on your selected surface. To perfectly deglossing the area, you have to continue the action multiple times. Put some more deglosser of the fabric if it is needed. Repeat the action several times to get a better result.
Step 04:Waiting for Setting up
Settling the deglosser on the surface is very important to get a perfect prepared wall. You have to allow the necessary time for the deglosser to set on the wall. The setting time depends on the quality of your selected product. There are some high-quality Liquid Sander Deglosser which require only ten to fifteen minutes to set up on the surface.
Step 05:Removing the Deglosser

After drying the deglosser properly, you have to remove it from the surface. There is a proper direction of applying and removal of liquid sander with the bottle. You can use lint-free cotton, cloths, or fabric to remove it.
Where to Use Liquid Sander Deglosser?
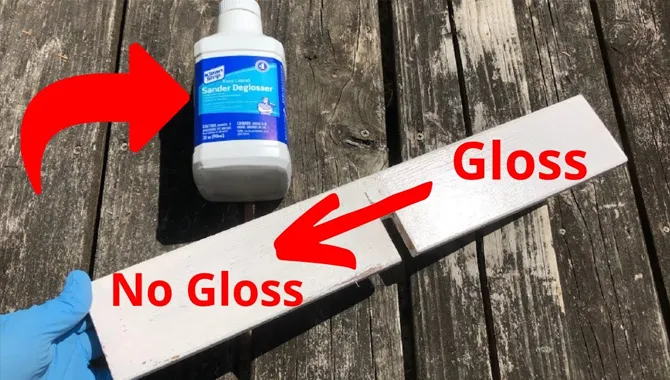
A Liquid Sander Deglosser can be used to serve multiple purposes. It is not only applicable for paintings. Rather you can apply it to many other things. You can also apply it on vernishes, stain removal, and enamel also.
The most prominent use of Liquid Sander deglosser is noticed on the kitchen cabinet, front door of the home, wooden mold, and on the furniture. The procedures of using deglosser in different objects are given below for your convenience.
Why is it Necessary to Use?

The chalky residue left on surfaces by various household products can be a real pain to get rid of. That’s where liquid sanders come in handy. Not only do they take care of the residue, but they’re also useful for removing unwanted dents and scratches from wood surfaces. Make sure to read the user manual carefully before using the sander in order to avoid any accidents.
And, of course, always wear eye protection and gloves when sanding to protect your hands and eyes. Liquid sanders are the perfect solution for taking care of pesky residue and scratches alike!
Dirt Removal and Cleaning

Making your home improvements a breeze is easy when you have a liquid sander deglosser like this one around. The sander removes dirt, dust, and fingerprints quickly and easily, leaving the surface clean and ready for future paint or finishing.
Keep in mind that liquid sanders like this one can cause some surface damage, so be sure to finish by drying the surface with a cloth to prevent further damage.
What is liquid Sander Deglosser?
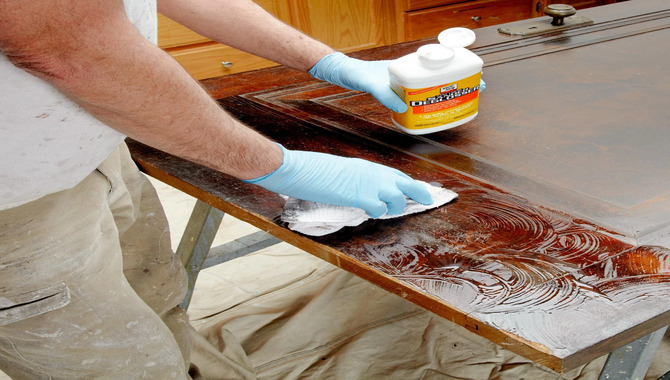
Deglossing is a process of removing the unwanted wax and residue from wood surfaces. This can be a time-consuming and tedious task, so why not make the process a little easier by using a liquid Sander Deglosser? This handy tool is easy to use- just apply it with a cloth and let it do its job.
It’s also versatile- you can degloss wood surfaces that are just stained, unfinished wood, or lacquered wood. Just be sure not to use it on finished wood as it could damage it.
In addition, liquid sanders are great for removing old varnish, polyurethane, or lacquer from wood. So, if you’re looking to degloss your wood surfaces in a hurry, reach for a liquid sander deglosser!
How to Use Liquid Sander Deglosser on Furniture?
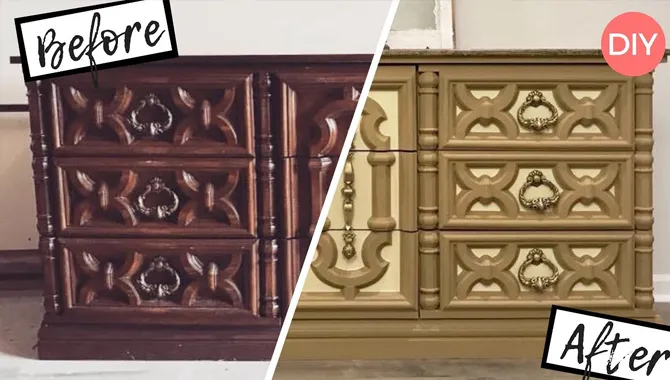
Appling a deglosser is very important to renew your old furniture. There is a common tendency of rubbing sandpaper frequently on the applying surface of the furniture while deglossing. But the deglosser does it for you. You can easily apply it on a slick and shiny surface. You will notice the best use of deglosser on the smooth and satin body of the furniture.
It is a bit hard to apply deglosser on the irregular and zigzag surface of a wooed furniture. In that case, you may apply a high-quality deglosser to avoid probable damage.
The easy procedures of using deglosser on furniture are following:
Step 01
Clean the wooden surface and remove the dust and the dirt very well with a cleaner. You can use the heavy-duty TSP Substitute Cleaner for cleansing purposes.
Step 02
Put some liquid sander deglosser on a cleaned, soft lint-free cloth and wipe the whole furniture with it. Don’t rub it only on the monodirectional way to get an effective result.
Step 03
Sometimes, the preprinted area has a double or triple coat of seal. To remove the shine of those multi-coated areas, you have to rub the area several times. In order to get better results, you can use a high-quality deglosser.
How to Use Liquid Sander Deglosser on Trim?
Are you worried about the adhesion of your paintings? A Liquid Sander Deglosser will be the right solution for you. Sandpaper can’t reach the details of the painting and can’t touch every corner equally. To get a deep touch up you should use Liquid Sander Deglosser.
The deglosser serves multiple purposes for editing a painting. It is also used to lengthen the sustainability of the painting. You can easily trim with a deglosser by following some easy steps, these are:
Step 01
Mark the area where you want to apply the deglosser and cover the surrounded and underneath area with waste cloths or newspaper. It will soak extracts after deglossing.
Step 02
Put some deglosser on a clean lint-free cloth or cotton pad and wipe the trim in a circular motion. It will clean all the dirt from the trim.
Step 03
Take a paintbrush and apply deglosser through the brush on the trim. Leave the deglosser for dry for a couple of hours.
Step 04
After drying the trim, it will be ready to paint again. Oil-based paintings are usually preferred to use for effective results.
How to Apply Liquid Sander Deglosser on Cabinets?
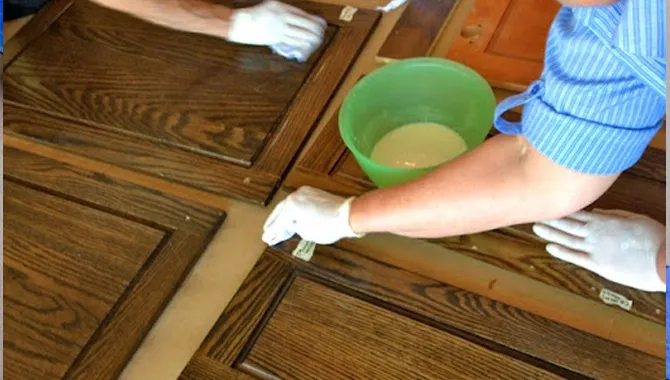
The decoration of the interior expresses the aristocracy and purity of mind. Clean and artistic home décor is always appreciated by all.
You can use a deglosser to paint on a pre-painted area to enhance the beauty or to change the design. You can apply a deglosser to your kitchen cabinets also. The procedures are given below:
Step 01
As the kitchen area is a bit messy and crowded area, we must wear safety accessories to handle the deglosser in the kitchen.
Step 02
Execute the whole operation on an open and ventilated area. With a washing, rag rubs the selected area with a deglosser.
Step 03
Wash the area and if it is needed, pour some more deglosser and rub again. Repeat the action several times. If your selected area had a smooth finishing, the deglosser would be able to vanish the gloss easily.
Things to Keep in Mind
Though the whole operation is not much critical, you have to do it with great care.
All sorts of chemicals are harmful to health if it is poured directly on the skin as liquid deglosser is also a chemical, you have to be cautious while using it. The most important factors that you have to keep in mind are:
⦁ You should not inhale the deglosser as it can harm your lungs. Must wear a mask and handle the chemical in a well-ventilated or open area.
⦁ Human eyes are very sensitive to chemical reactions. So, use a face shield or goggles and a painting apron to protect your eyes.
⦁ Avoid opening the bottle of the deglosser in front of sick people like pregnant women and children asthmatic patients.
⦁ Our skin is very much chemicals sensitive. So, you have to wash your hand with handwash or warm water to remove the chemicals inside your body through the skin.
⦁ Try to avoid linkage, fire, and electricity beside deglosser. And keep it away from children and the pet of your house.
Pros and Cons of Deglosser
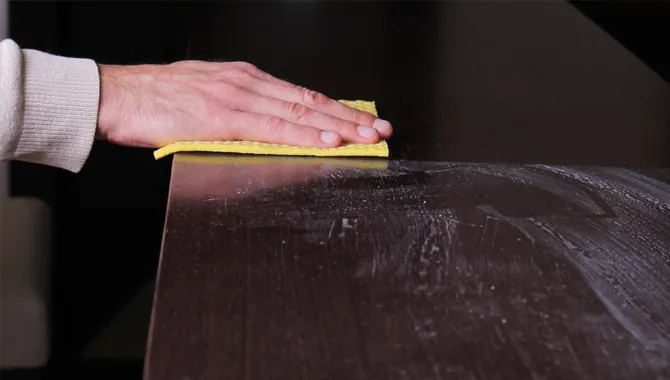
A liquid sander deglosser is made of chemicals, and a person should not use it without having a piece of proper knowledge about it. You should study all the benefits and shortcomings of the deglosser before applying it yourself. There are some pros and cons of it.
Pros of a Liquid Sander Deglosser
Before going to use the deglosser, measure the fact where and how you will apply the chemicals. The prominent advantages of a deglosser, for which people don’t get second thought to use it, are:
- You can use a liquid sander is easily and effortlessly, unlike old sandpaper.
- You don’t need to wait for a long time to use it as it consumes a very short time.
- If you consider the fact of safety, then a liquid sander will serve you the best as it creates less dirt and dust to wash out.
- A liquid sander can reach the toughest area of the painting or wooden craft, which is impossible for sandpaper.
- Using a liquid sander is not hazardous as using sandpaper as it is easy to handle and it creates less mess than other deglosser.
Cons of a Liquid Sander Deglosser:
As the liquid sander deglosser is made of chemicals, you have to be careful handling the tool. There are also some disadvantages of a liquid sander. There are:
- A liquid sander is somehow an overrated deglosser and not pocket-friendly enough for all.
- Allergic and asthmatics person should remain far from it as it is a chemical solution.
- You have to keep extra attention to use it if there are pregnant women, children of any pat in your house.
What is Liquid Sandpaper?
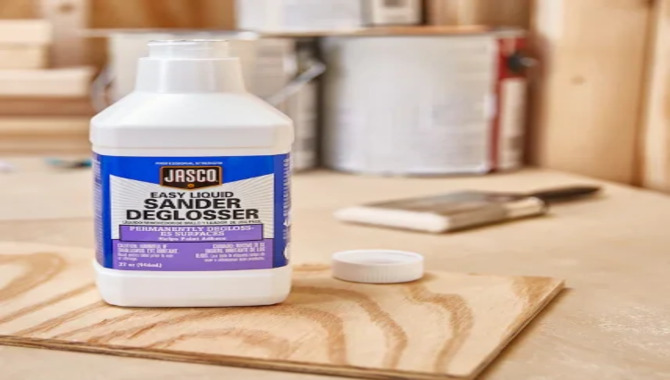
Deglossing is a process of sanding wood to bring out its natural finish and bring it back to its original color. This can be a time-consuming task, but liquid sandpaper makes it easier and faster.
It uses liquid instead of dust, which means that it’s easy to apply and sand. Plus, the liquid sandpaper reacts with the oils in the wood to remove any imperfections or built-up layers. Whether you’re looking to deglossing a wood surface for the first time or just want to enhance its finish, liquid sandpaper is the perfect solution!
Conclusion
While it’s a matter of giving an extraordinary look to your gallery, drawing room, decorative door, or kitchen cabinet, you might use a quality deglosser. But the best result you will find is if the liquid sander deglosser is handled by an expert. You can take help from professionals if you have to cover a large area. Now all the procedures and facts of your question How to Use Liquid Sander Deglosser are in your hand.
You can easily operate the Liquid Sander Deglosser by following the given steps and procedures. Don’t forget to take prevention. If you’re looking for an easy and efficient way to clean and degloss your wood surfaces, a liquid sander deglosser is the perfect solution for you!
By using this deglosser, you’ll be able to clean and remove all the dirt, dust, and grease from your wood surfaces in just a few easy steps. Plus, liquid sandpaper is a gentle and effective tool that will leave your wood looking new. If you’re ready to get your wood surfaces clean and deglossed, make sure to check out our website and take advantage of our special offers today!
FAQs
There are some more questions that people also want to know. The probable answers of those are given below:
1.Where can you use the sander deglosser?
Ans. A sander deglosser is a chemical that is used for removing the glossy effect of any object. You can use it on paintings, wooden artwork, furniture on wall painting.
To get an effective result, you can use a liquid sander deglosser which can reach every corner of an area.
2.How to wash a liquid sander deglosser after use?
Ans. Washing a liquid sander deglosser is the most important task you have to do after rubbing the wall with deglosser rest it for dry. Then rub it with soap and freshwater to remove all the signs and leave it again to dry.
3.How to rinse off the liquid sander deglosser?
Ans. A liquid sander deglosser doesn’t create much dust. You can cover the area with waste paper clothing so that you don’t need to face any problem cleaning the area. You just need to unveil the covered area after using the deglosser.
4.How to use liquid deglosser on the wall?
Ans. You can use liquid deglosser in any place where you want to give a new touch. To use it on the wall you have to follow some procedures. On a clean wall, you can apply the deglosser with a paintbrush. Then you have to rub it multiple times to erase the glossiness of the previous painting.
5.Do I Need To Wear Protective Gear While Using A Liquid Sander?
Ans. There is no set rule as to whether or not one needs to wear protective gear while using a liquid sander. Some sanding tips recommend using a dust mask and gloves, while others say that simply wearing a safe respirator and eye protection should be adequate. The safest course of action is to consult the manufacturer’s instructions for proper sanding attire.
6.What Are The Benefits Of Using A Liquid Sander?
Ans. There are many benefits to using a liquid sander. These include the ability to sand quickly and easily without sanding through materials, the convenience of being able to sand in small spaces, and the ability to sand wood, metal, and other surfaces without damaging them.
7.Is It Safe To Use A Liquid Sander On Wood Surfaces?
Ans. Sandpaper.com states, “When sanding wood, use a cloth or sandpaper to apply even pressure and avoid “chipping.” Avoid sanding too close to the edge of the board, as this can cause splitting.” The source for this information is sandpaper.com.
8.What Are Some Tips For Avoiding Accidents When Using A Liquid Sander?
Ans. Safe sanding tips include using sandpaper designed for woodworking, keeping the work area clean, and wearing a dust mask. The source of this information is the OSHA website.
9.How Do I Use A Liquid Sander To Remove Grime And Fingerprints From My Surfaces?
Ans. Sources of information: sandpaper tips from sandpaper-resource.com and liquid sanding from Fine Homebuilding. To clean fingerprints and grime from surfaces with a liquid sander, first wet the surface with water or degreaser. Apply sandpaper to the desired grit, starting with a low sandpaper setting, and work your way up until the dust is removed. Finish by sanding in the direction of the wood grain.

Leave a Reply