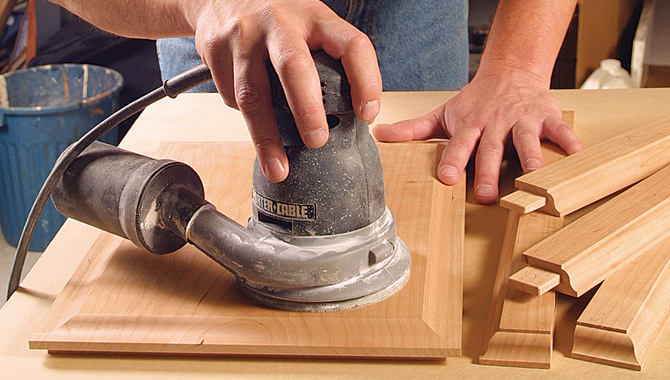
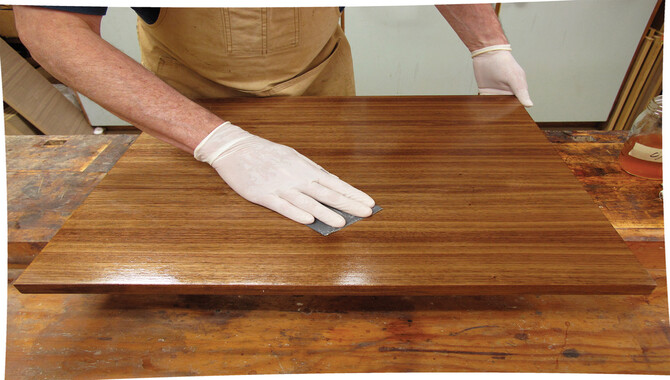
Sanding wood by hand may seem like a tedious task, but it can be a rewarding experience that leaves you with a smoother, more polished finish than using power tools alone. So it is essential to know how to sand by hand.
The first step is to choose the right sandpaper grit for the job. A lower grit, such as 80, is best for removing rough surfaces or paint, while a higher grit, like 220, is ideal for finishing touches.
Next, ensure you have a sanding block or sponge to hold the sandpaper in place. This will help provide even pressure and prevent uneven sanding. It’s also important to wear safety goggles and a mask to protect yourself from dust particles.
To begin sanding, start with the lower grit sandpaper and move in the direction of the wood grain. Use long, even strokes and apply consistent pressure. As you move up to higher grits, remove dust particles between each sanding with a clean cloth.

Understanding Different Types Of Sandpaper
Regarding DIY projects, sanding can be a crucial step in achieving a smooth and polished finish. However, with so many different types of sandpaper available on the market, it can be overwhelming to know which one to choose for your specific project. Understanding the differences between types of sandpaper can make a significant difference in the outcome of your project.
The most common types of sandpaper are aluminum oxide, silicon carbide, and garnet. Aluminum oxide sandpaper is the most commonly used type and is best suited for wood, metal, and plastic.
Silicon carbide is a harder and sharper abrasive and is best for wet sanding, as it can withstand water better than other types. People know that garnet sandpaper can produce a smoother finish, which makes it ideal for fine woodworking and furniture refinishing.
Gather The Necessary Materials:
- Identify the specific materials you need for your project or task. Make a list of everything you require.
- Determine where you can obtain the materials. Consider local stores, online retailers, or specialty suppliers based on availability and convenience.
- Research the prices and quality of the materials to ensure you are getting the best value for your money. Read reviews or compare prices from different sources.
- Create a budget for your materials to ensure you stay within your desired spending limit.
- Make a shopping list based on the materials you need, including quantities and specific details such as sizes, colors, or brands if applicable.
- Visit the stores or websites you identified earlier and start purchasing the materials. If you’re buying online, add the items to your cart and proceed with the checkout process.
- Double-check your list before finalizing the purchase to ensure you haven’t missed anything.
- If you encounter any difficulties finding certain materials, consider seeking alternatives or reaching out to experts or professionals in the field for guidance.
- Once you have acquired all the necessary materials, organize them in a suitable manner, taking note of any storage requirements or precautions.
A Step-By-Step Guide On How To Sand Wood By Hand

Sanding wood by hand is a time-consuming but rewarding process that can provide a smooth and even surface for your woodworking projects. Here is a step-by-step guideline on How to sand wood by hand. To begin, gather the necessary tools – sandpaper in various grits (coarse to fine), a sanding block or sponge, and a dust mask.
1. Gather The Necessary Supplies:
Collect the essential supplies for hand sanding, including sandpaper in various grits (coarse to fine), a sanding block or sponge, a soft cloth or tack cloth, and protective gear such as gloves and safety glasses.
2.Prepare The Work Area:
Choose a well-ventilated area to work in and cover the surrounding surfaces to protect them from dust and debris. Consider wearing a dust mask to prevent inhaling particles.
3.Choose The Appropriate Sandpaper Grit:

Begin with a coarse-grit sandpaper (such as 80 or 100 grit) to remove any rough or uneven surfaces. Gradually progress to medium-grit (such as 120 or 150 grit) and finish with a fine-grit sandpaper (such as 220 or 240 grit) to achieve a smooth surface.
4.Secure The Sandpaper:
If using a sanding block, attach the sandpaper to it by folding the sandpaper sheet around the block and securing it with the appropriate clips or clamps. If using a sanding sponge, ensure it’s clean and ready for use.
5.Start Sanding:
Hold the sanding block or sanding sponge firmly and move it in the direction of the wood grain. Avoid sanding against the grain as it can cause scratches. Apply even pressure but avoid excessive force to prevent damaging the wood.
6.Sand In Progressive Stages:
Begin with the coarse-grit sandpaper and make long, smooth strokes along the surface. Continue sanding until the rough areas and imperfections are smoothed out. Then, switch to the medium-grit sandpaper and repeat the sanding process to further refine the surface. Finally, move on to the fine-grit sandpaper to achieve a smooth, finished look.
7.Check The Progress:
Regularly inspect the sanded surface to ensure you’re achieving the desired level of smoothness. Use your hand or a cloth to feel for any remaining rough patches or imperfections. If necessary, go back and focus on specific areas that need additional sanding.
8.Clean The Surface:

Once you’ve completed the sanding process, use a soft cloth or tack cloth to remove any sanding dust from the wood. Wipe the surface gently to ensure it’s clean and ready for further treatment or finishing.
9.Finish Or Seal The Wood (Optional):
Depending on your project, you may want to apply a finish or sealant to protect the sanded wood and enhance its appearance. Follow the manufacturer’s instructions for the chosen finish or sealant product.
10.Preparing The Wood For Sanding
Before you start sanding your wood, it’s essential to prepare it properly to ensure the best results. The first step is to inspect the wood for any scratches, dents, or cracks that may need to be addressed before sanding. If you find any, you should fill them with wood filler and allow them to dry completely before sanding.
Sanding Techniques For Different Parts Of The Wood

To woodworking, sanding is an essential step in creating a smooth and even surface. However, not all parts of the wood require the same sanding technique. For example, when sanding the face of a board, it’s best to start with low-grit sandpaper and work your way up to a higher grit for a smooth finish. But when sanding the edges of a board, it’s important to be more careful to avoid rounding the corners.
A sanding block or clamp can help keep the edges flat while sanding. Additionally, when sanding curved or intricate parts of the wood, it’s best to use flexible sandpaper or a sanding sponge to avoid damaging the curves.
Sanding with the grain of the wood is always recommended to prevent scratches and ensure an even surface. It’s also important to dust off the surface between sanding grits to avoid leaving residue that can interfere with the next sanding step.
Sanding Edges And Corners
Sanding edges and corners can be challenging and time-consuming, but achieving a smooth and polished finish is essential. When sanding edges, using the appropriate sandpaper grit for the job is important.
Starting with a coarse grit will remove any rough edges, and then moving to a finer grit will ensure a smooth surface. When sanding corners, it is best to use a sanding block to prevent accidental rounding of the edges. Sanding blocks provide a flat surface that conforms to the shape of the corner, allowing for an even sanding job.
It is also important to use a light touch when sanding corners, as too much pressure can cause damage to the wood or material being sanded. To ensure a professional finish, paying attention to detail when sanding edges and corners is crucial. Taking the time to sand properly will result in a smooth and polished surface. Making the overall project look more professional and aesthetically pleasing.
Finishing The Wood After Sanding

Finishing the wood after sanding is an important step in the woodworking process, as it can make all the difference in the final product. Once the wood has been sanded to remove any rough spots or imperfections, it is ready to be finished. There are various finishing techniques that can be utilized to achieve different effects on the wood, such as staining, painting, varnishing, or applying a protective coat.
Staining the wood can enhance its natural beauty by bringing out its grain and color. The type of stain used will depend on the type of wood and the desired outcome. Paint can be used to add color or to cover up imperfections in the wood.
Varnishing can provide a glossy or matte finish and can protect the wood from scratches, moisture, and UV rays. Applying a protective coat, such as wax or oil, can bring out the wood’s natural texture and protect it from damage.
Safety Precautions For Hand Sanding Wood

To hand sanding wood, safety is of utmost importance. One of the most important safety precautions to take is wearing the appropriate protective gear. This includes safety glasses to protect your eyes from flying wood particles, a dust mask to prevent inhaling harmful dust, and gloves to protect your hands from splinters and rough surfaces.
Additionally, it’s important to ensure that the area you’re working in is well-ventilated to keep the air clear of dust and debris. Another important safety precaution is using the right sandpaper grit for the task.
Using too coarse a grit can cause the wood to splinter and create a hazardous surface while using too fine a grit can lead to over-sanding and potentially damage the wood. It’s also important to regularly check the sandpaper for signs of wear and tear, as worn-out sandpaper can lead to an uneven surface and potentially cause injury.
Conclusion
Knowing how to sand wood by hand is a crucial task that requires attention to detail and precision. You can achieve the desired results by following the steps outlined in this guide and using the right tools and techniques.
Remember to start with a coarse grit and work your way up to a finer grit, and always sand with the grain of the wood. With a little patience and practice, you can become proficient in hand sanding, and your finished product will be a testament to your hard work and attention to detail.
FAQs
1.Why Is Sanding Wood Necessary?
Ans: Sanding wood helps to smooth the surface, remove imperfections, and prepare it for finishing or painting.
2.How Do I Choose The Right Sandpaper Grit For Wood Sanding?
Ans: Start with a coarse grit (around 80) for initial sanding to remove rough spots or paint. Progressively move to finer grits (120-220) for smoother finishes.
3.Should I Sand With Or Against The Grain Of The Wood?
Ans: Generally, it’s best to sand with the grain of the wood to prevent scratches. Sanding against the grain can leave visible marks.
4.How Can I Sand Small Or Intricate Areas Of Wood?
Ans: Fold the sandpaper and use your fingers to sand those areas. Alternatively, you can wrap sandpaper around a small piece of wood to create a makeshift sanding block.
5.Can I Wet Sand Wood By Hand?
Ans: Wet sanding is possible but typically done with power tools. If you choose to wet sand by hand, make sure to use waterproof sandpaper and keep the surface wet throughout the process.

Leave a Reply