Sanding wood is an essential step in various woodworking and DIY projects, and using a palm sander can make the process more efficient and precise.
A palm sander is a handheld power tool specifically designed for sanding smaller areas and intricate details. Its compact size and an ergonomic grip allow for better control and maneuverability, making it suitable for professionals and DIY enthusiasts.
By understanding how to sand wood with a palm sander, you can achieve a smooth and even surface, remove imperfections, and prepare the wood for further finishing or painting. This introduction highlights the importance and feasibility of utilizing a palm sander in woodworking projects, ensuring optimal results with less effort and time.
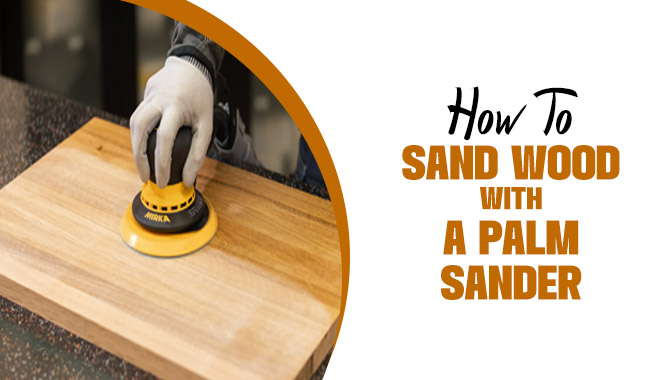
What Is A Palm Sander?
A palm sander is a versatile handheld power tool for sanding wood surfaces. It is designed to fit comfortably in the palm of your hand, providing better control and maneuverability during sanding tasks.
With its compact size and lightweight construction, a palm sander allows precise sanding in tight spaces and corners. It utilizes orbital or vibrating motion to remove material and create a smooth and polished finish on various types of wood.
Understanding The Different Types Of Palm Sanders Available
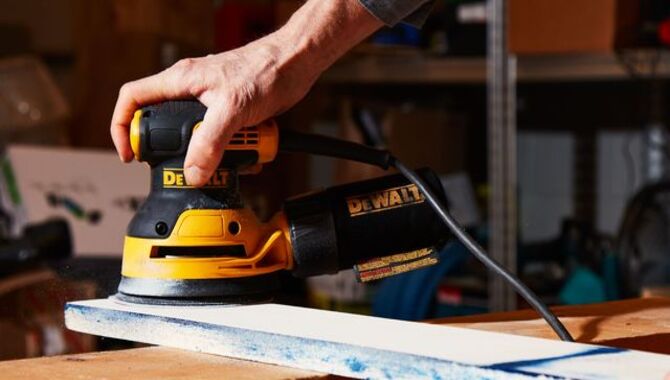
Several types of palm sanders are available in the market, each with unique features and advantages. The most common types include orbital palm sanders, random orbital palm sanders, and detail palm sanders.
Orbital palm sanders move in a circular motion, while random orbital palm sanders combine orbital and vibrating actions, reducing swirl marks on the wood. Detail palm sanders are designed for intricate and delicate sanding tasks. Understanding the different types helps you choose the right palm sander that suits your sanding needs and preferences.
Tools Needed To Sand The Wood With A Palm Sander
When using a palm sander, having the necessary tools and accessories for effective and safe sanding is important. The essential tools include the palm sander, sandpaper with various grits, a dust collection system or vacuum, safety goggles, and a dust mask.
The palm sander should have the appropriate sanding pad or base to hold the sandpaper securely. Having the right tools ensures efficient material removal, minimizes dust, and protects your eyes and respiratory system.
Tips About How To Sand Wood With A Palm Sander

Using a palm sander to sand wood has several important benefits. First, it allows for a smooth and even finish, essential for achieving a professional-looking result. Additionally, sanding with a palm sander can save time and effort compared to sanding by hand.
The tool’s small size and maneuverability make it ideal for getting into tight spaces and corners. Lastly, using a palm sander can help to prevent fatigue and strain on the hands and wrists, making it a more comfortable option for extended sanding sessions.
Overall, a palm sander is a valuable tool for any woodworking project that requires sanding. Here are some tips on how to sand wood with a palm sander:
1. Choose The Right Sandpaper Grit:
Choosing the right sandpaper grit is crucial for achieving the desired results using a palm sander. The grit refers to the coarseness or fineness of the sandpaper, and different grits are suitable for various stages of the sanding process.
Coarser grits, such as 40 to 80, are ideal for removing heavy material or paint, while medium grits, like 120 to 180, are suitable for smoothing and leveling surfaces. Finer grits, such as 220 to 400, are used for final sanding and achieving a polished finish. Understanding the purpose of each grit helps you select the appropriate sandpaper for efficient and effective sanding.
2. Prepare The Surface To Be Sanded:
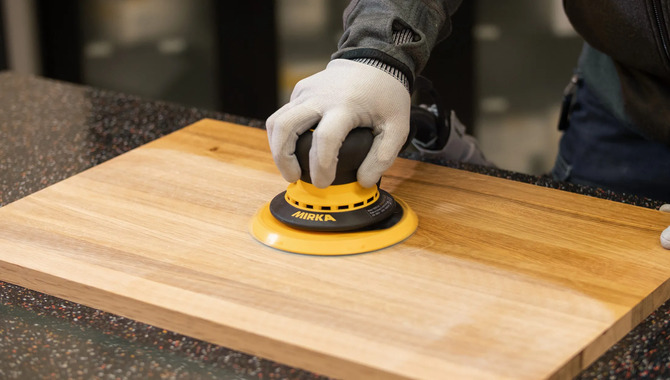
Before using a palm sander, preparing the surface to be sanded properly is essential. Start by removing any loose dirt, debris, or previous finishes using a brush or vacuum. Inspect the surface for protruding nails, screws, or rough spots and fix them as necessary.
If there are deep scratches or gouges, consider filling them with wood filler and allow them to dry before sanding. Taking the time to prepare the surface ensures smoother sanding and prevents damage to the palm sander or uneven results.
3. Wear Protective Gear For Sanding
Sanding wood can generate a significant amount of dust and debris, which can be harmful if inhaled or gets into your eyes. Therefore, wearing protective gear while sanding with a palm sander is important.
Safety goggles protect your eyes from flying particles, while a dust mask or respirator helps filter out dust and prevent respiratory irritation. Additionally, wearing ear protection can reduce the noise level the palm sander produces. Prioritizing safety by wearing appropriate protective gear ensures a safer and more comfortable sanding experience.
4. Connect The Sander To A Power Source
Once you have chosen the right sandpaper grit, prepared the surface, and put on your protective gear, it’s time to connect the palm sander to a power source. Most palm sanders are electric and require an electrical outlet.
Ensure the power cord is in good condition and properly connected to the sander. Some palm sanders may also have a battery-powered option, so make sure the battery is charged and securely attached. Connecting the sander to a power source lets you operate the tool and begin the sanding process effectively.
5. Turn The Sander On And Begin Sanding

Once the palm sander is properly connected to a power source, turn it on and prepare to start sanding. Ensure you have a firm grip on the sander and position it on the surface to be sanded. Activate the sander’s power switch and let the machine reach its operating speed before contacting the wood. Starting the sander and initiating the sanding motion is the first step toward achieving a smooth and even finish.
6. Move The Sander In A Back-And-Forth Or Circular Motion
When using a palm sander, moving the tool in a back-and-forth or circular motion is essential. This motion ensures that the sanding action is distributed evenly across the surface and prevents the formation of sanding lines or uneven spots.
Maintain a steady pace and apply consistent pressure as you guide the sander across the wood. Avoid overlapping the sanding strokes to avoid creating visible lines or patterns on the surface. The proper motion helps achieve uniform sanding and optimal results.
7. Apply Even Pressure On The Sander

While sanding with a palm sander, applying even pressure on the tool is crucial. Pressing too hard can cause uneven sanding and remove more material than desired, while insufficient pressure may result in incomplete sanding.
Maintain a consistent pressure level as you move the sander across the wood surface. Even pressure ensures that the sandpaper makes even contact with the wood, allowing for uniform material removal and a smoother finish.
8. Sand With Progressively Finer Grits
To achieve a polished and refined result, it is necessary to sand with progressively finer grits. Start with coarser grit sandpaper to remove roughness or imperfections, and gradually transition to finer grits for smoother sanding.
This gradual progression helps to refine the surface, eliminate scratches left by coarser grits, and prepare the wood for a final finish. Sanding with finer grits progressively enhances the smoothness of the wood, allowing for a professional and polished appearance. Remember to clean the surface thoroughly between each grit change to prevent cross-contamination.
9. Clean Up The Dust In The Sander:
After completing the sanding process, cleaning up the accumulated dust in the sander is essential. Use a brush or a soft cloth to remove the dust from the sander’s surface, vents, and other accessible areas. Regularly cleaning the sander helps maintain its performance and prevents dust from interfering with future sanding tasks.
10. Finish The Wood Surface

Once the sanding process is complete, it’s time to apply a finish to the wood surface. Finishing products like varnish, stain, or paint can enhance the appearance and protect the wood.
Follow the manufacturer’s instructions for the specific finishing product you choose, and ensure the surface is clean and free of any dust or debris before applying the finish. Applying a finish adds a protective layer and brings out the natural beauty of the wood.
Troubleshoot Common Sanding Problems
While using a palm sander, you may encounter common sanding problems like swirl marks, uneven sanding, or sandpaper clogging. To troubleshoot these issues, try adjusting the sanding technique, changing the sandpaper grit, or cleaning the sander and sandpaper.
Pay attention to the sanding patterns. The pressure applied and the condition of the sandpaper. Adjustments can help you overcome these challenges and achieve a smoother, more consistent sanding result.
Maintenance And Care For Your Palm Sander
Proper maintenance and care are essential to prolong the lifespan of your palm sander. Regularly clean the sander, remove dust and debris, and inspect the power cord for damage. Lubricate the moving parts as the manufacturer recommends and store the sander in a clean and dry place.
Additionally, periodically check the sandpaper attachment mechanism and replace any worn-out parts. By maintaining your palm sander, you can ensure its optimal performance and longevity.
How Expensive Can It Be To Sand The Wood With A Palm Sander?
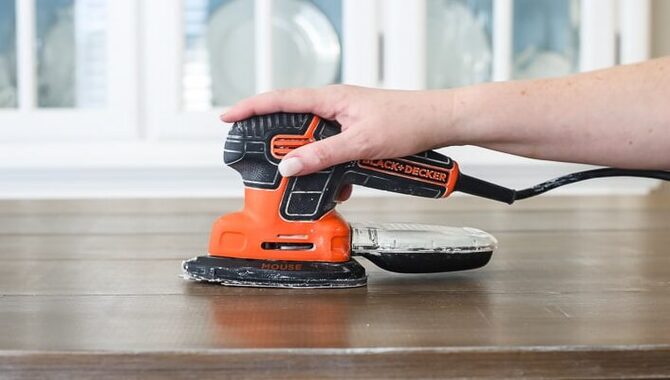
The cost of sanding wood with a palm sander can vary depending on several factors. These factors include the quality and brand of the palm sander, the type and quantity of sandpaper used, and any additional accessories or attachments required. Generally, palm sanders are considered affordable and offer good value for their performance.
They are a cost-effective solution for DIY enthusiasts and homeowners who want to achieve smooth and polished wood surfaces without needing professional sanding services. Compared to other sanding methods, using a palm sander can be a more economical choice in the long run, especially for small to medium-sized projects.
Advantages And Disadvantages Of Sanding Wood With A Palm Sander
Sanding wood with a palm sander offers several advantages, such as its compact size, ease of use, and versatility for small to medium-sized projects. Palm sanders are efficient in removing material and providing a smooth finish.
However, they may not be suitable for large-scale projects and can be more time-consuming than larger sanders. Additionally, palm sanders can produce vibration and noise, requiring protective gear and caution. Understanding the advantages and disadvantages helps you make an informed decision when selecting the appropriate sander for your needs.
Conclusion
Knowing how to sand wood with a palm sander is valuable for woodworking enthusiasts and professionals. Using a palm sander offers numerous benefits, including efficient and precise sanding, improved control and maneuverability, and tackling smaller areas and intricate details.
Utilizing this handheld power tool can achieve smooth and even surfaces, remove imperfections, and prepare the wood for further treatment or finishing. The specificity and effectiveness of a palm sander make it a versatile and practical tool for various woodworking projects.
Whether you are refinishing furniture, smoothing rough edges, or prepping surfaces for painting, mastering the art of sanding wood with a palm sander ensures optimal results and enhances the overall quality of your woodworking endeavors.
Frequently asked questions:
1.What Type Of Sandpaper Should I Use With A Palm Sander?
Ans: Use sandpaper with grits between 80 and 220, depending on the desired smoothness. Start with a lower grit for rough surfaces and move to a higher grit for finishing touches.
2.How Do I Attach The Sandpaper To The Palm Sander?
Ans: Most palm sanders have a hook-and-loop or clamp system. Align the sandpaper with the sander’s base and secure it using the appropriate method.
3.How Do I Know When To Change Sandpaper Grits?
Ans: Change the grit when you have achieved the desired level of smoothness or when the sandpaper becomes clogged and less effective.
4.How Can I Minimize Dust While Using A Palm Sander?
Ans: Attach a dust collection bag or vacuum hose to the palm sander to capture dust particles and ensure proper ventilation.
5.Should I Wear Any Safety Gear While Using A Palm Sander?
Ans: Yes, wear safety goggles, a dust mask, and ear protection to protect yourself from dust and noise.

Leave a Reply