You are walking inside your house, smirking with pride at the furniture adorning your dream house. You have spent a lot of time and in your search for the perfect furniture that enriches your home. But then you stop on your tracks. You look up and down at a recently acquired table with gaping eyes before you stare at its legs.
“Preposterous!” You cry out with anger and hate at the blemish that woke you up from your dream. So, how to sand table legs? To those who have suffered from this, you guys probably already know what we are talking about. That’s right- the problem of our today’s topic is on how to sand your table legs.

Why Are Sanding Table Legs Important?
We sand our table legs to make them look new. That might be one of the most significant reasons for sanding. However, another reason for which you must sand your leg as soon as possible is that the coarse legends could cause some damage or splint to your floor surface.
Craftsmen sand their furniture in general for a reason above. They tend to sand their projects before the final assembling and selling to avoid any customer complaints. You might also consider sanding to remove any old finish or unwanted paints. Sanding is a better alternative than simply throwing the table away.
Cost Of Sanding Table Legs
Cost: 500 to 3500 USD
The total cost for sanding table legs varies highly depending on the instrument you will be using. If you go for second-hand ones, they might be around 500 USD. More high-end newer equipment is about 500-3500 USD If you are new to crafting without any prior experience, we recommend you buy second-hand ones or even consider renting them.
Time Taken To Sand Table Legs
Time: 5 minutes to 30 minutes
If you are a veteran with the newest tech-savvy equipment, you would probably sand a single leg in 5 minutes. Someone utterly new to craftsmanship would, however, take about half an hour long. This might feel like a long time but shouldn’t feel disheartened over it. If you master the art, you too will surely take less time.
Equipment And Tools Needed
While there are many tools needed to sand your table, you can follow through the ones mentioned below:
- Rubber Contour
- Sand Paper
- Emory Board
- Sanding Disc
- Stain Remover or Chemical Stripper
- Paint Spray
- Power Tools (Dremel tools, Palm Sander, Detail Sander, etc.)
How To Get The Look:
When it comes to sanding table legs, the end result should be a leg that’s extremely smooth and free of any imperfections. This is a difficult task, but the results are well worth it! To get the look, start by sanding the legs down to a very smooth surface. Be sure to wait several hours after applying the sealer before you finish up with the sanding process. Remember to use an industrial-grade wood sealer to protect the finish from water and oil spills. Have fun sanding table legs, and don’t be afraid to experiment – the end result will be amazing!
How To Bleach Wood:
When sanding wood, always use a coarse grit to remove the surface scratches. This will help prevent the wood from warping and sticking to the sandpaper. For stained or damaged areas, use a finer grit to get deeper down into the wood. This will help to remove the stain or damage and make the wood more stain- and scratch-resistant.
To finish sanding, always flood the area with water before beginning the bleaching process, so all of the dirt and contaminants are washed away first. After the area is sanded and bleached, let it sit for an hour (or longer) before rinsing it off and drying it off completely.
Sand Your Table Legs In 8 Easy Steps
Sanding table legs is an important step in refinishing or restoring a table. To sand table legs, you will need the following materials: sandpaper (preferably in various grits), a sanding block or electric sander, and a clean cloth to wipe away dust.
Start by removing any existing finishes or paint from the table legs using a paint stripper or sandpaper. Once the legs are bare, begin sanding them with coarse-grit sandpaper to remove any rough spots or imperfections. Gradually work your way up to finer grits of sandpaper, smoothing the surface of the legs with each pass.
Be sure to sand in the direction of the wood grain to avoid creating scratches. Once you are satisfied with the smoothness of the legs, wipe them down with a clean cloth to remove any dust. Now your table legs are ready for finishing!
Step 1:Unscrew All The Parts And Strip The Paint
To not damage the central table while sanding the legs, you should first unscrew and remove the parts from each other. Many tables might be stuck to their legs using some strong adhesive. In that case, you should use a scraper to remove the adhesion between the two parts.
When done with the separation, rub the legs with a stain remover or chemical stripper using a rag to get rid of the old, damaged finish. Wait for the chemical to dry off before carrying out the rest of the steps.
Step 2:Pad The Grooves With Rubber Contours

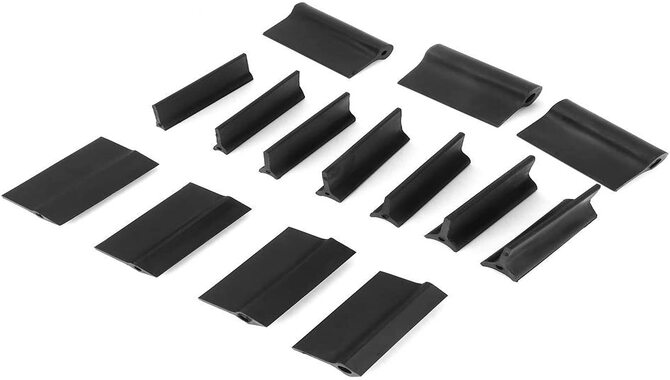
Rubber contours are rubber padding that comes in various sizes. They look concave in shape and are incredibly handy when padding the grooves of the table legs. You are supposed to fix the rubber contours over the grooves of the table legs to ensure that their radius is unchanged. It also helps prevent fatigue from the long-term refurbishment process and any damage that might follow.
Step 3:Sand The Flat Surfaces With A Sponge
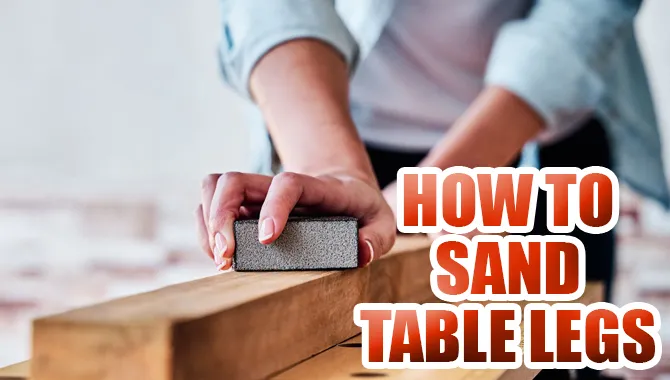
Take a sponge and attach sandpaper to it. Sand the plat surfaces using this setup. In this way, more surface area of the legs will be covered in less time. Even the effort made will be less since you will have a good grip on the sponge.
Step 4:Use Sand Papers Where Two Segments Of A Leg Come Together

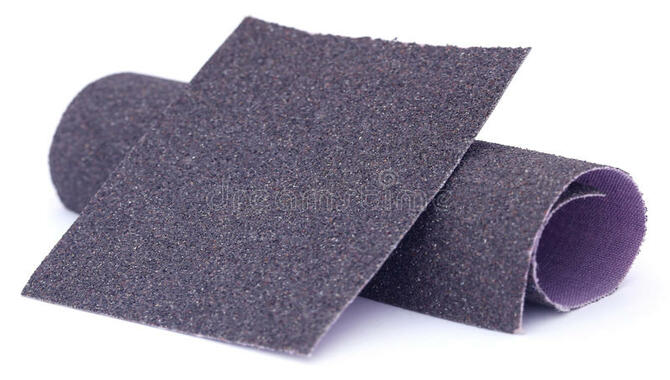
There will be part in the leg of your table that will be divided into segments. These segments look like two pieces of wood welded together (if wood can be welded, that is). To sand these parts, you must acquire sandpaper first. Sandpapers are easy to find from any hardware store. They are pretty inexpensive and are considered one of the most essential and basic tools for sanding.
The sandpaper, you will notice, is too large for such a small part. It will never fit, you will realize. It is in such cases that you need to learn to improvise. Stick rolls of tape to the back of the paper and use a scissor to cut out the sandpapers the size of the tape. ‘Viola!’ they should fit the segments by now. Use it to rub-down the narrow places just like the previous step.
Step 5:Using Electric Power Tools
Power tools come in handy in a lot of places. They help decrease the time and effort required while increasing the quality of the sanding. While you can use a Dremel tool, you should use a detail sander instead if you have a lot of money to spend,. Detail sanders are more budget-friendly than most other tools. They have the same purpose that most other tools have. They are mainly used to sand the corners and concave circular parts of the table leg.
Your leg might have some very complicated lavish design, such as a lion head. Detail sanders can get the sanding done for such parts without any hassle. Of course, aside from the ones mentioned above, you could use various other tools found in the market like palm sander, orbital sander, or even belt sander.
Step 6:Use An Emory Board To Sand The Crevices, Corners, And Places You Might Miss
Emory boards are manual cutter-like machines. They are tiny and can be used in corners or grooves where the more comprehensive tools cannot reach. These small used make it very convenient. Using an Emory board gives chances for more delicate craftsmanship and further details. You could even add your design while you are at it. The only con of this tool is that you must have perfect eyesight and a great sense of details to use it. Otherwise, you could ruin what is there on your table leg.
Step 7:Clean The Sand-dust Using A Sand Disc
When you sand the legs, you will produce a lot of sand dust. Sand discs are circular devices that vacuum the surface of the legs from any dust. They are also extra helpful since while cleaning, they tend to sand any uneven, coarse segments making them more smooth. An excellent alternative to a sand disc is a vacuum cleaner. While it will indeed do the cleaning, it won’t carry out the further smoothing step.
Step 8:Paint The Legs Using Paint Spray
Now that we are done with the significant steps, we can move on to the final step. Before painting, you are advised to rub the legs with a dry rag and trace the surface to ensure that the legs are smooth. You could attach tapes to any segment you might not want to paint and then spray paint the exposed parts. Leave them dry before assembling and screwing them back to the main tabletop when you are done painting.
Mistakes You Shouldn’t Make When Sanding
- Never sand too fast since you could end up not sanding all parts evenly.
- Don’t sand while the wood is still wet since this could cause problems with the metal tools being used.
- Never sand one spot for too long. This could cause the case of over sanding.
- You should change your sandpaper periodically since you might miss out on sanding evenly otherwise.
- You should remove the sand-dust as soon as you can. These might mess up your workstation otherwise. Also, take the necessary steps to control the flow of the sand-dust.
Simple Tips And Tricks You Can Use For Sanding
Sanding isn’t an easy skill. However, if you have enough dedication and follow some tricks, you will get the hang of it soon. We have mentioned some tips and tricks that you could follow while you are sanding.
- You should rub the sandpaper in a certain orientation only, for instance, along the wood grain. If you rub it randomly or against the grain, you will scratch the wood and form marks. Instead of making it smoother, the legs will then turn rougher.
- Make sure to oil your tools and sanders properly before use and make sure they aren’t rusted. Rusted and dry tools will hamper the sanding as they will not work well.
- Always sand the simple flat parts first and then move on to the more detailed grooves and convex segments. Otherwise, if you get too much frustrated, you might make a blunder and damage the table leg beyond repair.
- Don’t use sandpapers that are too long. Cut them into appropriate sizes before use. Long sandpapers will decrease your visuals when working into grooves and corners that require close inspections.
The Light Gray Table With Wood Legs:
Do you love the look of light gray wood legs on your table but hate the hassle of sanding them? Don’t worry, and we’ve got the solution for you! First, remove any furniture ornaments from the table. Next, clean the legs with a mild wood cleaner and dry them completely before starting to sand. Once the legs are clean and sanded, prime them with a protective finish (like polyurethane), and your new table is ready for use!
However, before you finish, it’s important to sand down the edges of each leg until they’re level and smooth. Make sure not to remove too much of the old finish. Finally, use a (#80-grit sandpaper) to sand down the edges of each leg until they’re level and smooth – making sure not to remove too much of the old finish. Your new light gray table legs are now ready for use!
Conclusion
Well then, it looks like you have already learned the ABCs of sanding. While you are at it, you will find out lots of problems. You might even get frustrated and curse out in despair. But do not lose hope. You might be a newbie right now but know that even the old veterans you charge you a minimum of 150 USD per hour for a piece were once beginners to the craft.
Make sure to follow through with the tips and tricks and avoid making the mentioned mistakes. When you master sanding, you will surely love it- we can guarantee that. I hope now you know how to sand table legs.
Frequently Asked Questions
1.Is Sanding Wood Messy?
Ans. Yes, sanding wood is messy. But you could take some precautions like carrying out the process on top of some old paper or using a vacuum cleaner to remove all the sands from work. Even if the work is messy, you should never overlook the accomplishment that follows. So do not worry about the mess!
2.Why Does It Seem To Cost So Much To Sand Table Legs By Myself?
Ans. As we mentioned earlier, buying your equipment might come off as very expensive. The reason for this is because although the hand tools might be cheaper, the cost of the power tools is pretty high.
Most of the net cost for the entire set falls on the power tools. Of course, you could always borrow them from someone you might know. Many shops even rent these hardware tools; you could also go and visit them.
3.Is Sanding Wooden Furniture And Table Legs The Same?
Ans. Although the processes and most of the tools used in both are the same, more time and a greater area will be required for sanding the entire wooden furniture. Tools with stronger motor power should be considered when sanding furniture.
4.Is The Orbital Sander The Same As The Palm Sander?
Ans. While they do the same work, they are a different tool in their base. Palm Sanders are smaller than their counterpart and even more lightweight. However, orbital Sanders carries further advantages since it can get the work done faster due to its huge size. If you have large furniture, Orbital Sanders would be your best friend.
5.Orbital Sanders vs. Palm Sanders Pros Of Using Orbital Sander Cons Of Using Orbital Sander
Ans.
- Less prone to causing damage 1) Very Expensive
- It doesn’t cause much mess 2) Poor performance on corners
- It can be used for heavy-duty project
6.Pros Of Using Palm Sander Cons Of Using Palm Sander
Ans.
- Lightweight and portable 1) Motor not powerful
- Ideal for small corners 2) Leaves marks
- Cheaper 3) Uneven scratching pattern

Leave a Reply